Introduction
First post in 2019, so Happy New Year! Besides assembly programming, I love to play wargames. One of my favorite games is Empire of The Sun by Mark Herman. This game simulates the Pacific Theater of World War II on an operational level. The Japanese must force the US into negotiating a peace treaty by lowering US political will, while the Allies must push back the Japanese and prevent them from taking precious resources that will fuel the Japanese war machine.
The game ships with a bot called Erasmus that is meant to simulate an opponent and as a teaching tool for the game. I decided to take on the draft of the new Card Driven Solitaire System and its companion cards one fine evening. (You have to be a member and logged into boardgamegeek to view these files)
I play as Japan against the Allied Erasmus. Here you’ll find a fast & loose game I played against it. The idea was to get a quick overview of how Erasmus works. So please forgive me if I skip any rules or details. So you should be somewhat familiar with the rules.
That being said, let’s get into it!
Setup
For simplicity, I play the 1942 Campaign.
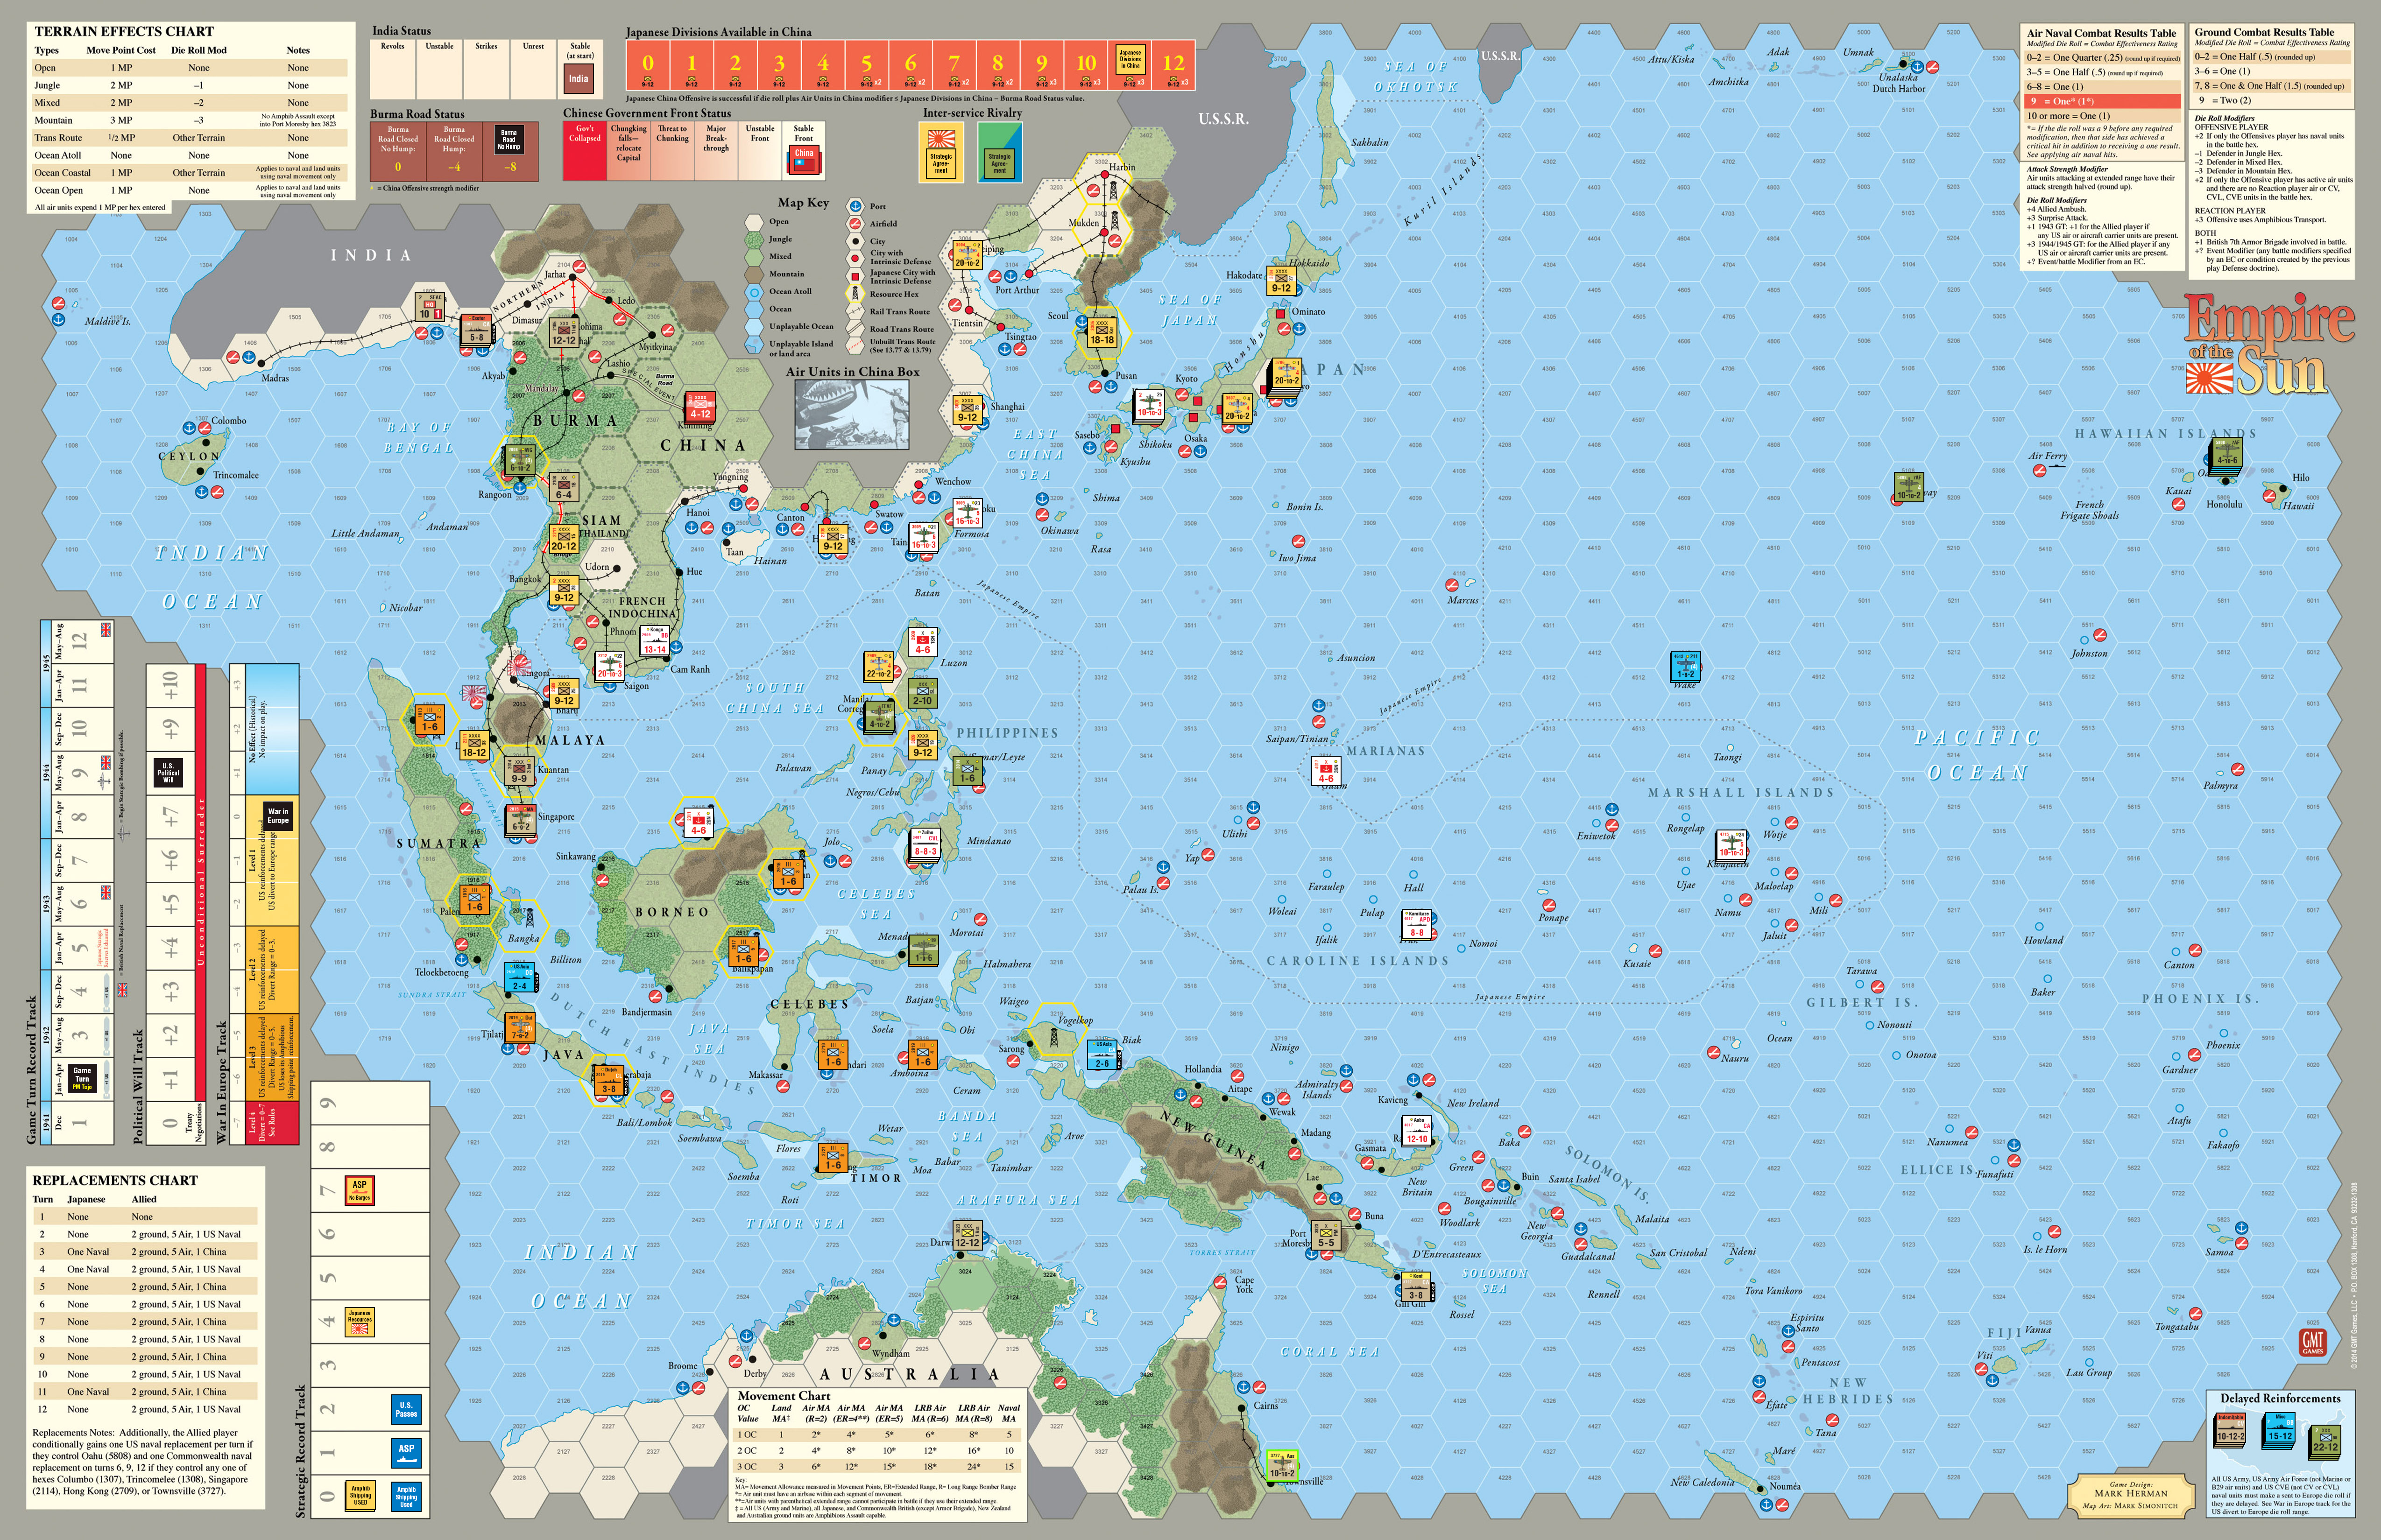
As per scenario rules, the Allies get free Naval Emergency Movements to open the game. I use the “default” Allied moves:
- US DD Asia to Batavia (2018)
- US [CA Asia] to Biak (3319)
- Dutch CL to Soerabaja (2220)
- Australian CA Kent to Gili-Gili (4024)
- British CA Exeter to Dacca (1905)
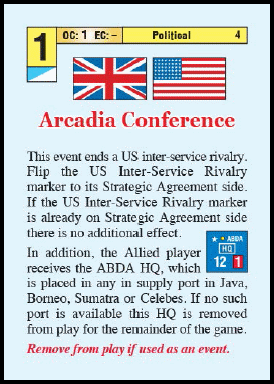
Unit names in brackets denote reduced units. After the Emergency Movements, I draw the opening hands. I opt for the historical variant to ensure an aggressive Japanese opening. The Allies opt to take the Arcadia Conference card (#4) since there really isn’t a reason not to.
Here’s the Japanese opening hand:
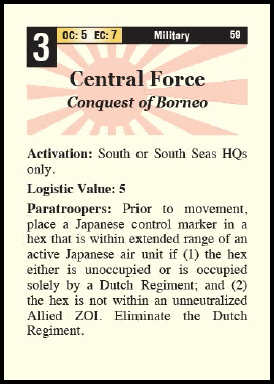
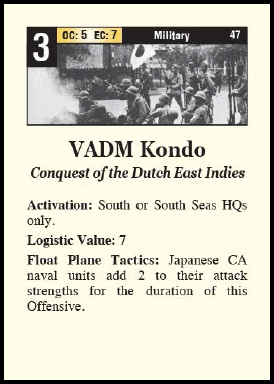
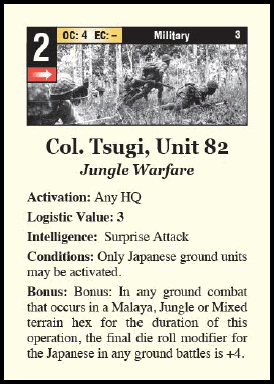
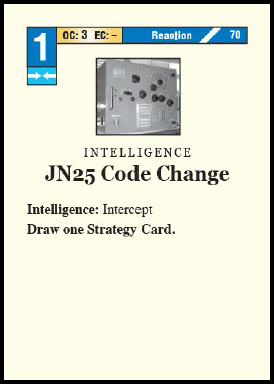
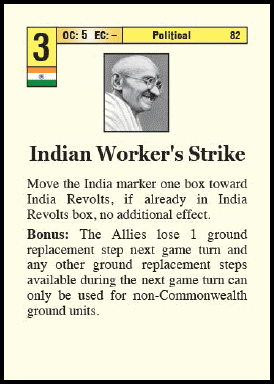

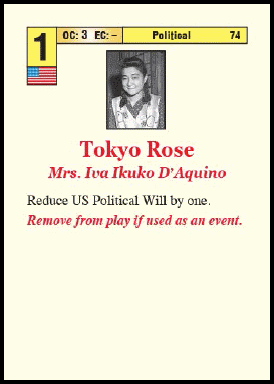
I get three offensive cards, one reaction card, and three political cards.
And here’s the opening hand of the Allies:
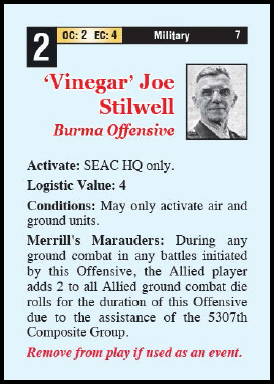
Not very impressive opening hands, let’s see where this takes us.
Japan Card 1: VADM Kondo (#47) as EC

I commence the festivities with a standard offensive: My goal is to take out the Allied air units in the Philippines, Malaya, and Dutch East Indies. This will prevent the Allies player from activating his HQs in Manila and Singapore (for a while at least). I activate the South Seas HQ in truk (4017) for 7 + 2 = 9 activations.
Activations and Movements: South Seas HQ for 9 activations
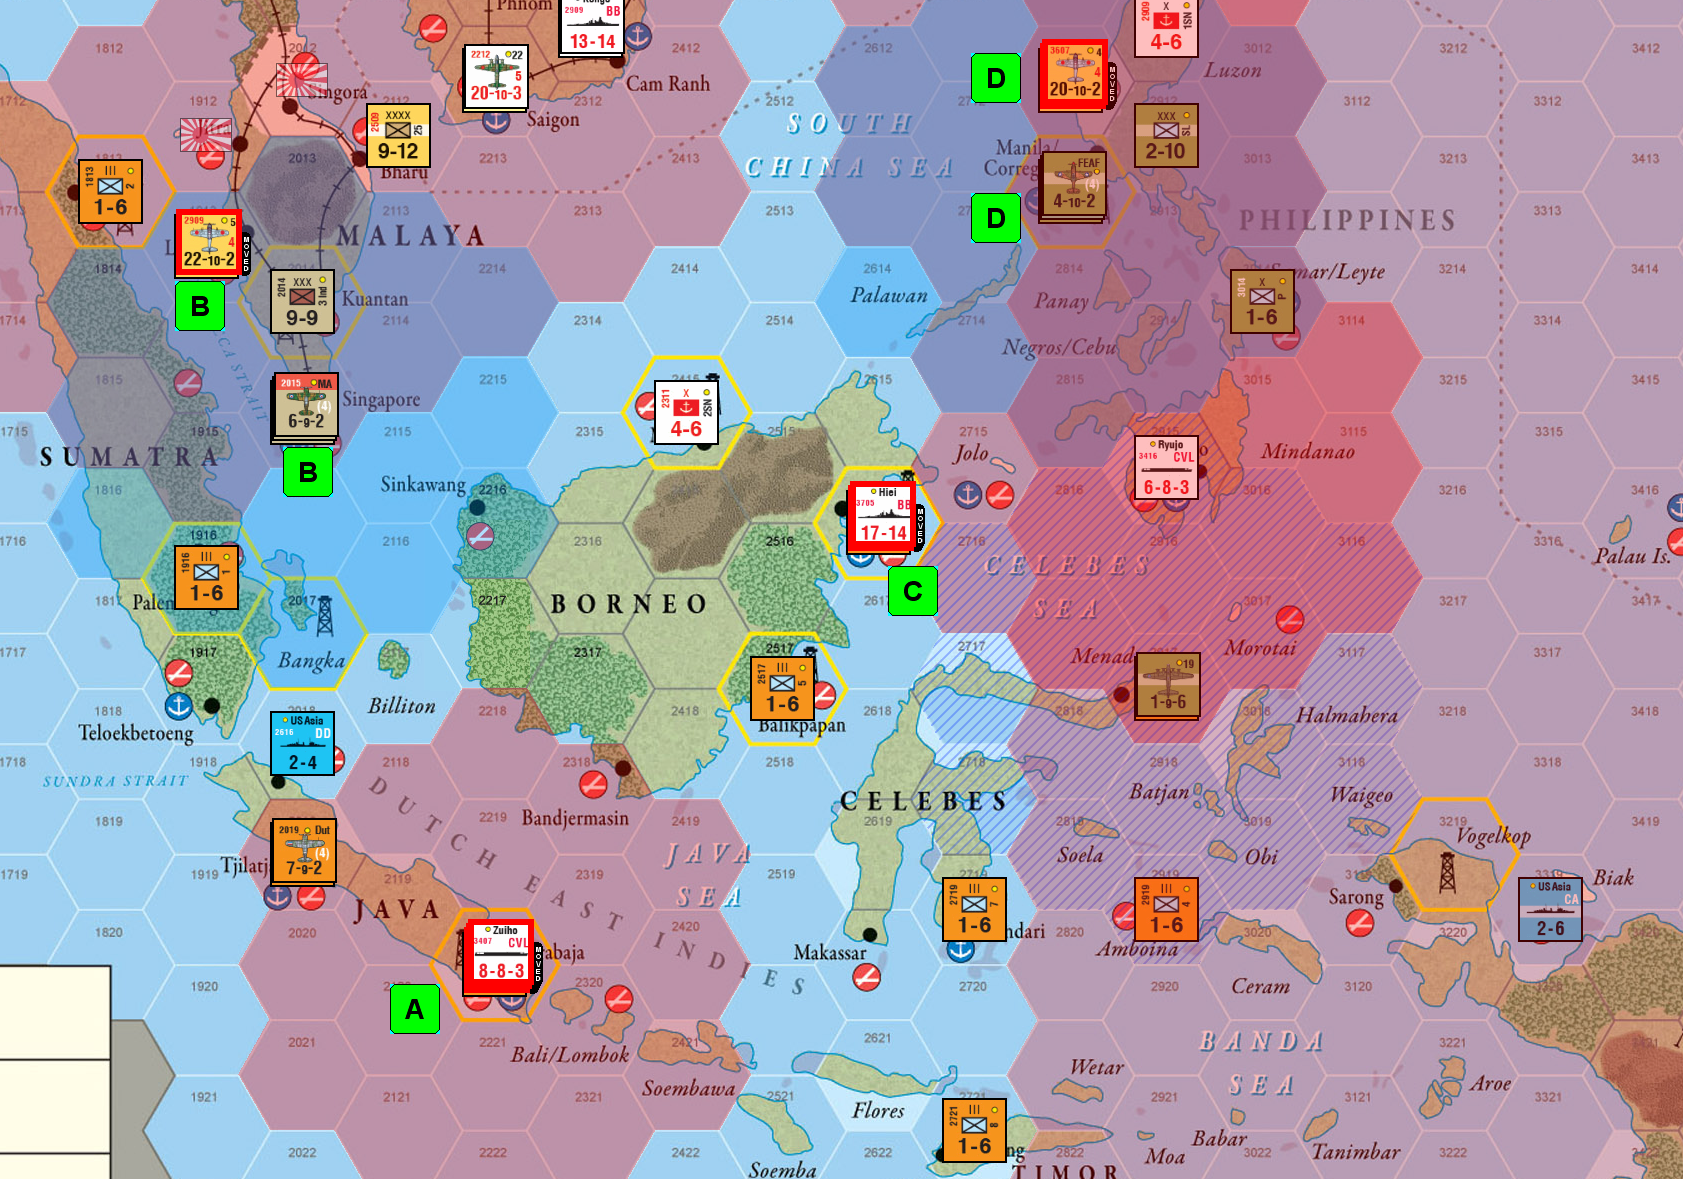
- The 3rd and 4th Air Division move from Nagoya (3407) to Aparri (2911) They’ll attack Manila (2813); Manila will be a battle hex
- The 5th Air Division moves from Clark Field (2812) to Kuala Lumpur (1913) They attack Singapore (2015), so it will be a battle hex
- CVL Ryujo, CA Nachi, and [16th Army] invade Soerabaja (2220), so another battle hex (Use one ASP)
- BB Hiei moves to Tarakan (2612), as does [19th Army] for an invasion. Tarakan will be a battle hex (Use one ASP)
- 1st Air Division uses Strategic Movement to Truk (4017)
Reactions: Now Erasmus comes into play for the first time. Erasmus will tell you how your opponent acts and reacts according to a given set of decision matrices.
Open the link I provided earlier to follow the decision matrix on page 12:
A: No → B: Yes → C: Yes → D: No or E: No or F: No → Intel Roll: 1 - 2DRM = -1, Intercept → H: No and I: No → Execute PBM if applicable
There are no Allied reaction moves. Erasmus can’t match my firepower (for now…)
Battle Resolution: There are four battle hexes to resolve:
- Soerabaja (A): Japan 20 (+2 from event) vs. Allies 3. Japan roll: 2 for 5 hits. Allies roll: 8 for 3 hits. All hits are lost, but Japanese total attack strength is higher after Air-Naval Combat, so the invasion is successful. Japan controls Soerabaja.
- Singapore (B): Japan 22 vs. Allies 6. Japan roll: 6 for 22 hits. Allies roll: 0 for 2 hits. Japan reduces and destroys MA air unit for 18 hits (4 hits lost), Allies again don’t have enough hits (2 hits lost).
- Tarakan (C): No Air-Naval Combat, so we move directly to Ground Combat. Japan 9 vs. Allies 1. Japan roll: 2 + 2DRM = 4 for 9 hits. Allies roll: 0 + 3DRM = 3 for 1 hit. Dutch 3rd Regiment is destroyed (3 hits lost), Allies lose their hit. Japan now controls Tarakan.
- Manila (D): Japan 40 vs. Allies 4. Japan roll: 5 for 40 hits. Allies roll: 8 for 4 hits. FEAF Air Unit destroyed (30 hits lost), Allied hits have no effect (4 hits lost).
Dutch CL unit conducts Naval Emergency Movement to Tjilatjap (2019).
Post Battle Movement: The Allies have no active unit eligible for PBM, so Japan conducts PBM next.
- CA Nachi moves from Soerabaja (2220) to Miri (2415)
- BB Hiei moves back to Tokyo (3706)
- 4th Air Division moves to Tarakan (2616)
- All other naval and air units stay where they are; CVL Ryujo prevents the units in Tjilatjap (2019) from being activated.
Allies Card 1: Arcadia Conference (#4) as EC

Here Erasmus uses the Axis of Determination to plot its first move, you can find it on page 7:
A: Yes → B: No → C: No → D: No → Establish ABDA
As per the strategy box, we move ABDA HQ into Kendari.
Japan Card 2: Central Force (#59) as EC

My first offensive went smoothly, so I’ll try to keep up the momentum and continue to push into the Dutch East Indies.
Activations and Movements: South HQ for 6 activations
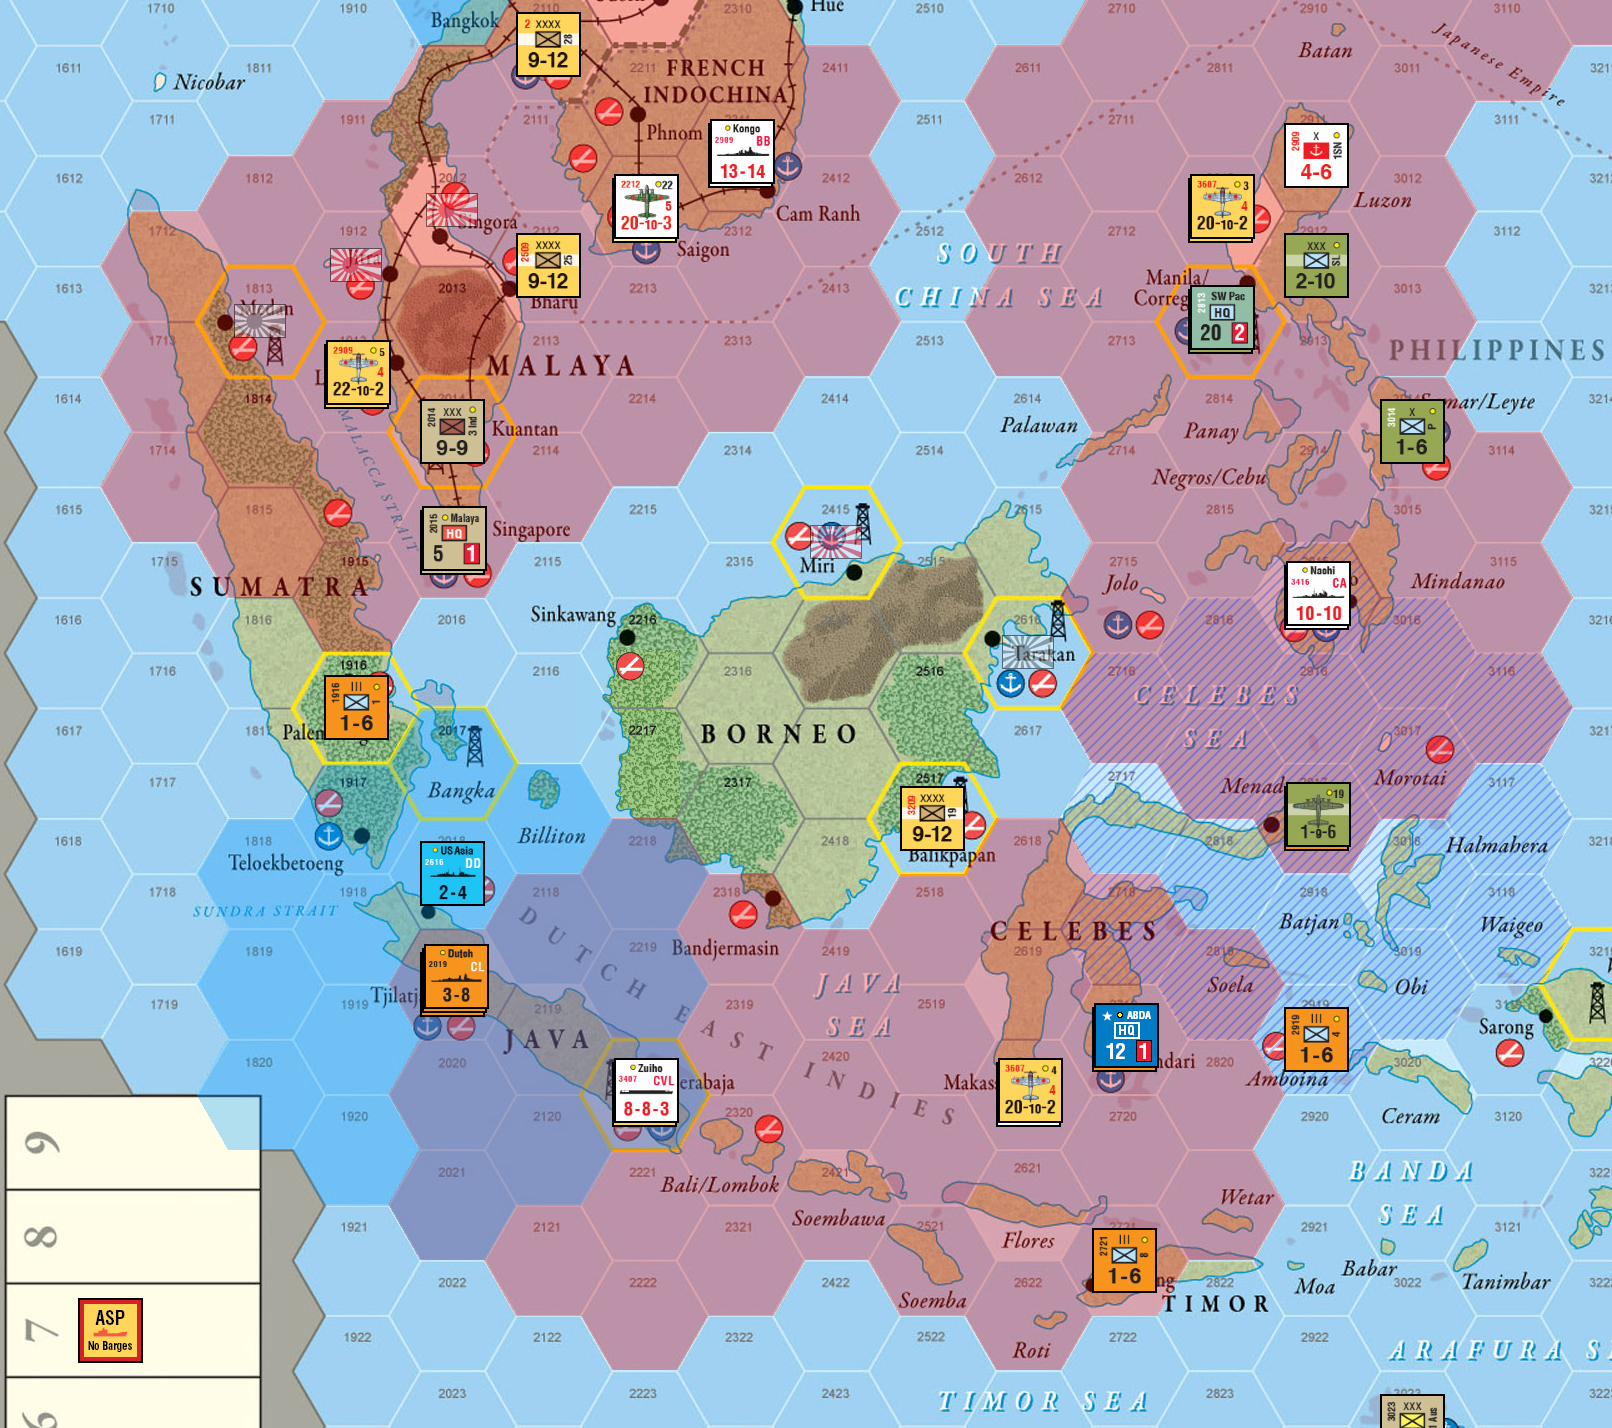
- [19th Army] moves from Tarakan (2616) to invade Balikpapan (2517) (Use one ASP)
- 4th Air Division in Tarakan (2616) supports the invasion of Balikpapan
- CVL Zuiho from Soerabaja (2220) moves to Balikpapan (2517) for invasion support
- CA Nachi and 2nd Marine Brigade move from Miri (2415) to Makassar (2620)
- 5th Air Division in Kuala Lumpur (1913) is active but doesn’t move
As per card event, I took Medan (1813) with paratroopers, destroying the 2nd Dutch Regiment.
Reactions: Erasmus follows the same pattern as with Japan Card 1. Intel roll: 6 - 2DRM = 4. The attack is intercepted. Erasmus again can’t mount an effective defense force. Basically, the Reaction matrix will only send a reaction force, if it can match the attack strength of the offensive forces; this is not the case, Erasmus could only muster a total reaction force of 14 attack (DD US Asia, CL Dutch, [CA US Asia], and Dutch Air Unit).
Battle Resolution: There’s one battle to resolve:
- Balikpapan (A): Since I have naval and air units, I get a +4DRM, which makes this battle an auto-win for me. 5th Dutch Regiment is destroyed. Japan controls Balikpapan.
Post Battle Movement: The Allies have no active unit eligible for PBM, so Japan conducts PBM next.
- CA Nachi moves to Davao (2915)
- CVL Zuiho moves back to Soerabaja (2220)
- 4th Air Division moves to Makassar (2620); this puts ABDA HQ out of supplies
Allies Card 2: ‘Vinegar’ Joe Stilwell (#7) as EC

Erasmus uses the Axis of Determination:
A: Yes → B: No → C: No → D: Yes → E: No → CBI Defense
Erasmus wants to increase defenses in the Ceylon-Burma-India region. Card Selection to page X tells us which card to use:
A: No → Sort Cards accordingly → L: No and M: Yes → B: Yes → (C: No →) E: No → F: No → G: Yes → Restricted Event Strategy
Erasmus plays ‘Vinegar’ Joe Stilwell (#7) as EC.
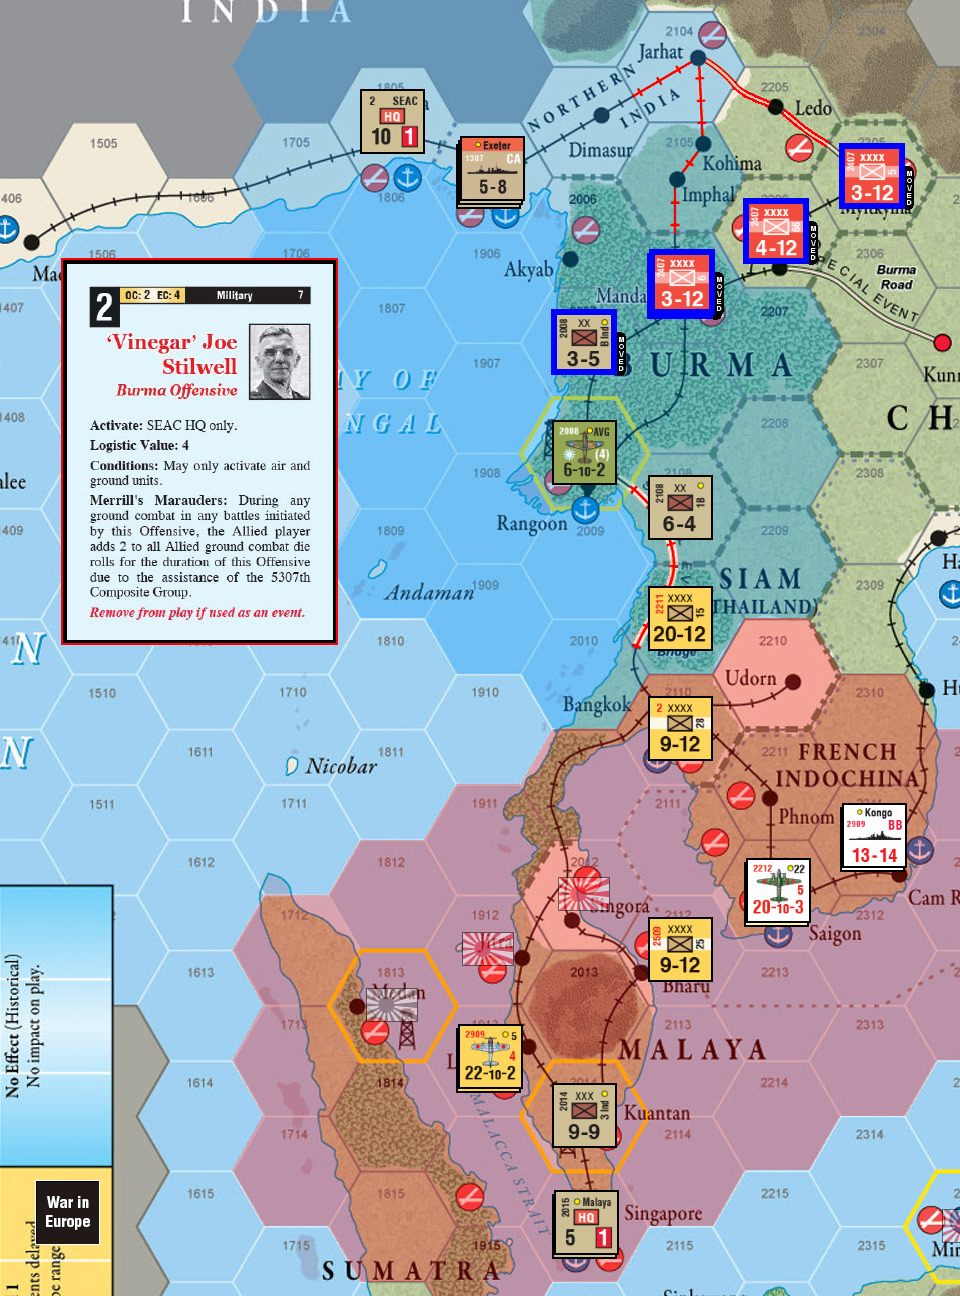
Activations and Movements: SEAC HQ for 5 activations
- 1st Indian Corps moves to Mandalay (2106)
- Indian B Division moves to 2007
- [66th Chinese Army] moves to Lashio (2206)
- [6th Chinese Army] moves to Mandalay (2106)
- [6th Chinese Army] moves to Myitkyina (2305)
Japan Card 3: Indian Worker’s Strike (#82) as OC

After a fairly good DEI campaign, I turn my attention West. I want to establish a foothold on New Guinea.
Activations and Movements: Combined Fleet HQ for 6 activations
- The [27th Army] invades Amchitka (4700) (Use one ASP)
- BB Hiehi and [18th Army] invade Wewak (3720) from Tokyo (Use one ASP)
- [BB Yamato] moves to Biak (3319), will be a battle hex.
- [35th Army] and CA Nachi invade Vogelkop (3219) (Use one ASP)
Reactions: Again, Erasmus follows the same route in the Reaction decision matrix. There’s nothing to counter the might of the Yamato…yet. The Intel roll for the Allies is a 4, so the attack is intercepted.
Battle Resolution: One battle to resole:
- Biak (A): Japan 9 vs. Allies 2. Japan roll: 3 for 5 hits. Allies roll: 6 for 2 hits. All hits are lost, but Japanese total attack strength is higher after Air-Naval Combat, so technically a Japanese victory. Dutch CL unit conducts Naval Emergency Movement to Tjilatjap (2019).
Post Battle Movement: The Allies have no active unit eligible for PBM, so Japan conducts PBM next.
- [BB Yamato], BB Hiei, and CA Nachi all move to Truk (4017)
I have a foothold on New Guinea, and invaded Alaska. I probably won’t hold Alaska, but it will force Erasmus to react to it, might spent 1 or even 2 cards on it just so he doesn’t lose 1 Political Will over it (also, I wanna see if Alaska is accounted for in the Allied version of Erasmus).
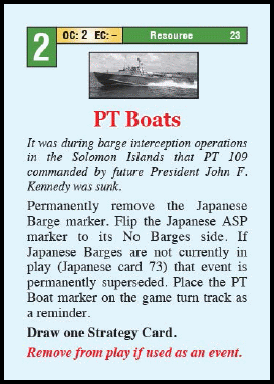
Allies Card 3: PT Boats (#23) as OC

Erasmus uses the Axis of Determination:
A: Yes → B: No → C: No → D: Yes → E: No → CBI Defense
Erasmus continues to increase defenses in CBI.
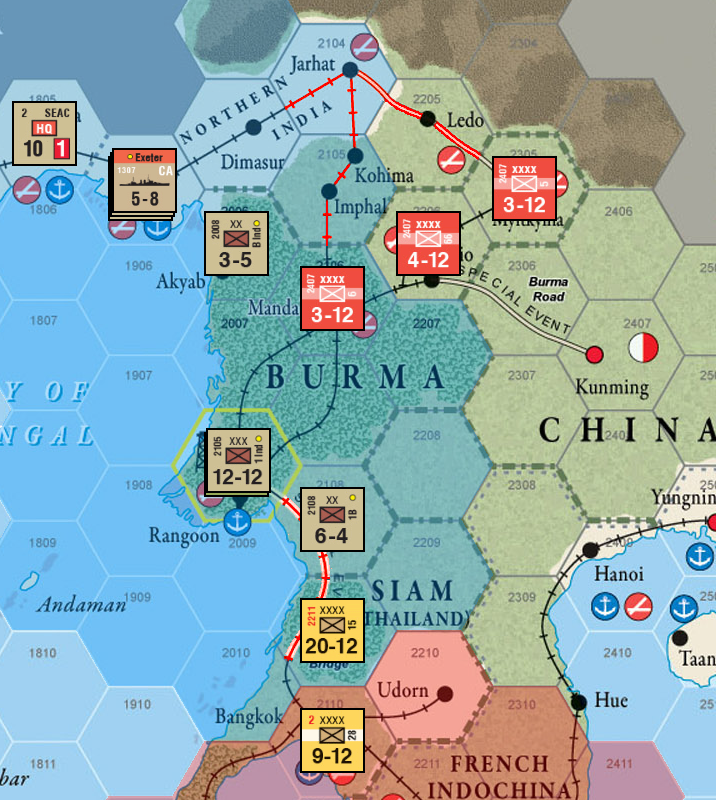
Activations and Movements: SEAC HQ for 3 activations
- Indian B Division moves to Akyab (2006)
- 1st Indian Coprs moves to Ragoon (2008)
The CBI Defense is now set.
Japan Card 4: Minor Axis Victory (#57) as OC

I reduce the War in Europe status by 2.
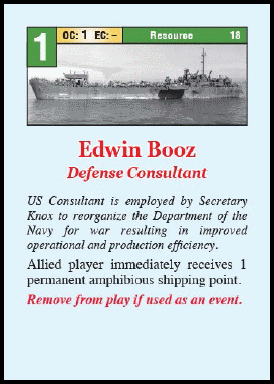
Allies Card 4: Edwin Booz (#18) as EC

By now you know the drill, Erasmus uses the Axis of Determination:
A: No → F: No and G: No → H: Yes and I: No → Event Strategy
Erasmus gains one ASP.
Japan Card 5: JN25 Code Change (#70) as OC

I continue my conquest of New Guinea.
Activations and Movements: South Seas HQ for 3 activations
- [18th Army] invades Lae (3822) (All Japanese ASP used)
- CA Aoba and the Marine Brigade invade Buna (3922)
There are no legal reactions for the Allies. So all is good (for the Japanese).
Allies Card 5: Pass
A: No → F: Yes and G: Yes → Pass
Japan Card 6: Col. Tsugi (#3) as OC

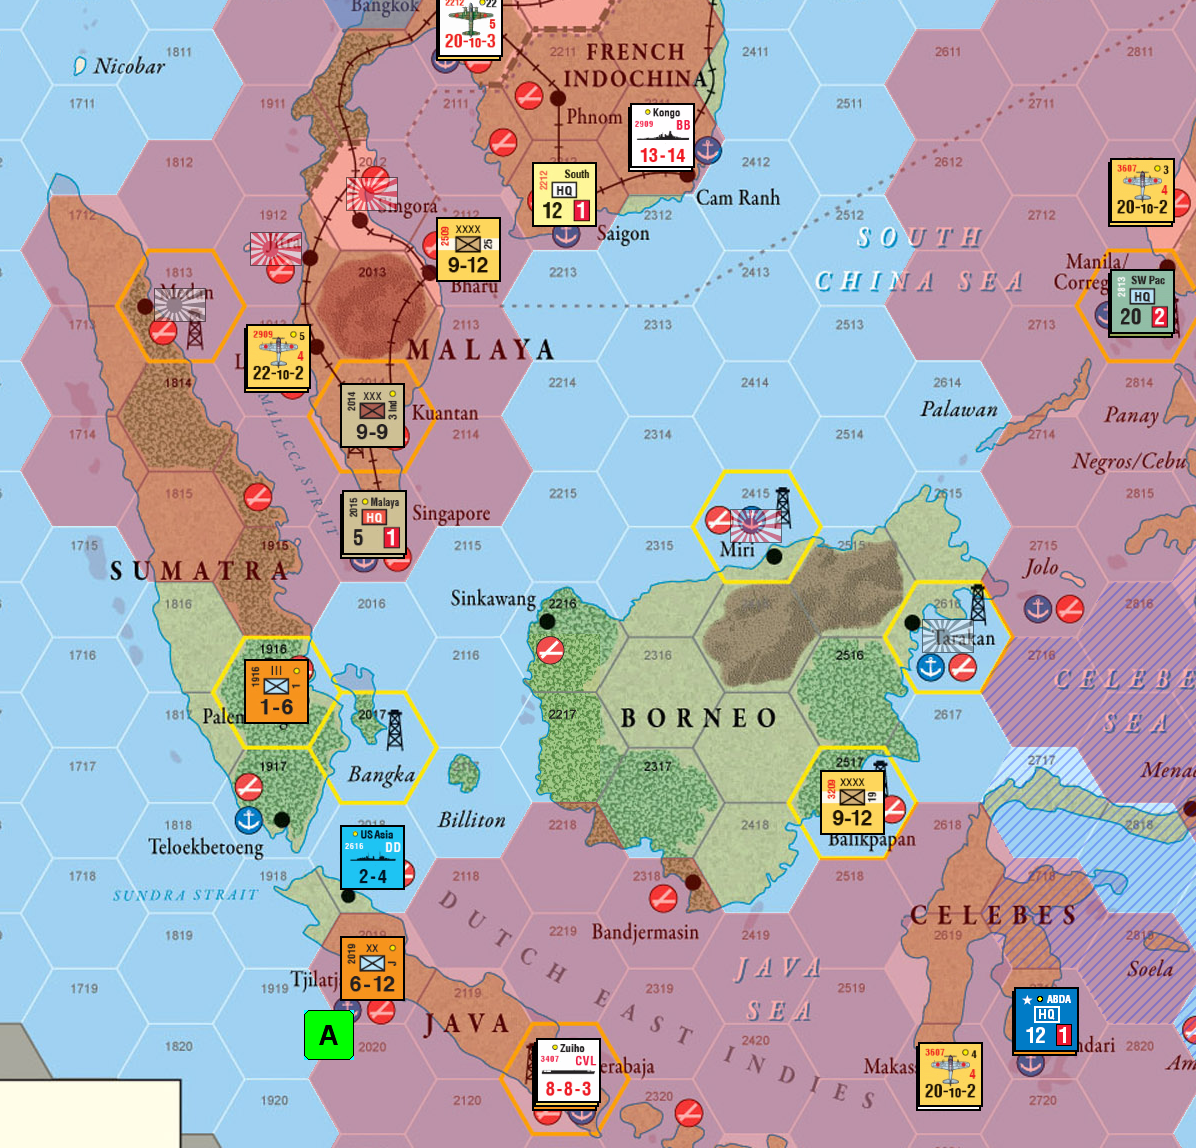
I use my second-to-last card to put my 20th Army Corps in supply, and try to take out the last Allied air unit in the Dutch East Indies.
Activations and Movements: South HQ for 3 activations
- 22nd Air Flotilla moves to Bangkok (2110)
- BB Kongo and CA Mogami move to Tjilatjap (2019), will be a battle hex.
Erasmus Intel roll: 9! Woo, a surprise attack!
Battle Resolution: One battle to resole:
- Tjilatjap (A): Japan 25. Japan roll: 8 for 25 hits. The Dutch Air Unit is destroyed.
Post Battle Movement:
- BB Kongo and CA Mogami move back to Cam Ranh (2311)
Allies Card 6: Pass
A: No → F: Yes and G: Yes → Pass
Japan Card 7: Tokyo Rose (#74) as EC

Here I realised a mistake: I wanted to invade Guadalcanal next, but it is beyond the reach of CA Aoba and its Marine Brigade.
So I play for the event and reduce US Political Will by one to seven.
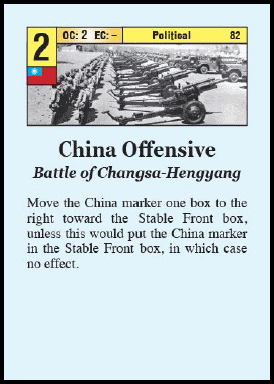
Allies Card 7: China Offensive (#82) as FOQ

For the last card, the Allies again play Event Strategy; but since this would be pointless, I decide to save this card as future offensive card.
Situation End of Turn 2
This is the board situation at the end of turn 2 with attrition phase already done:
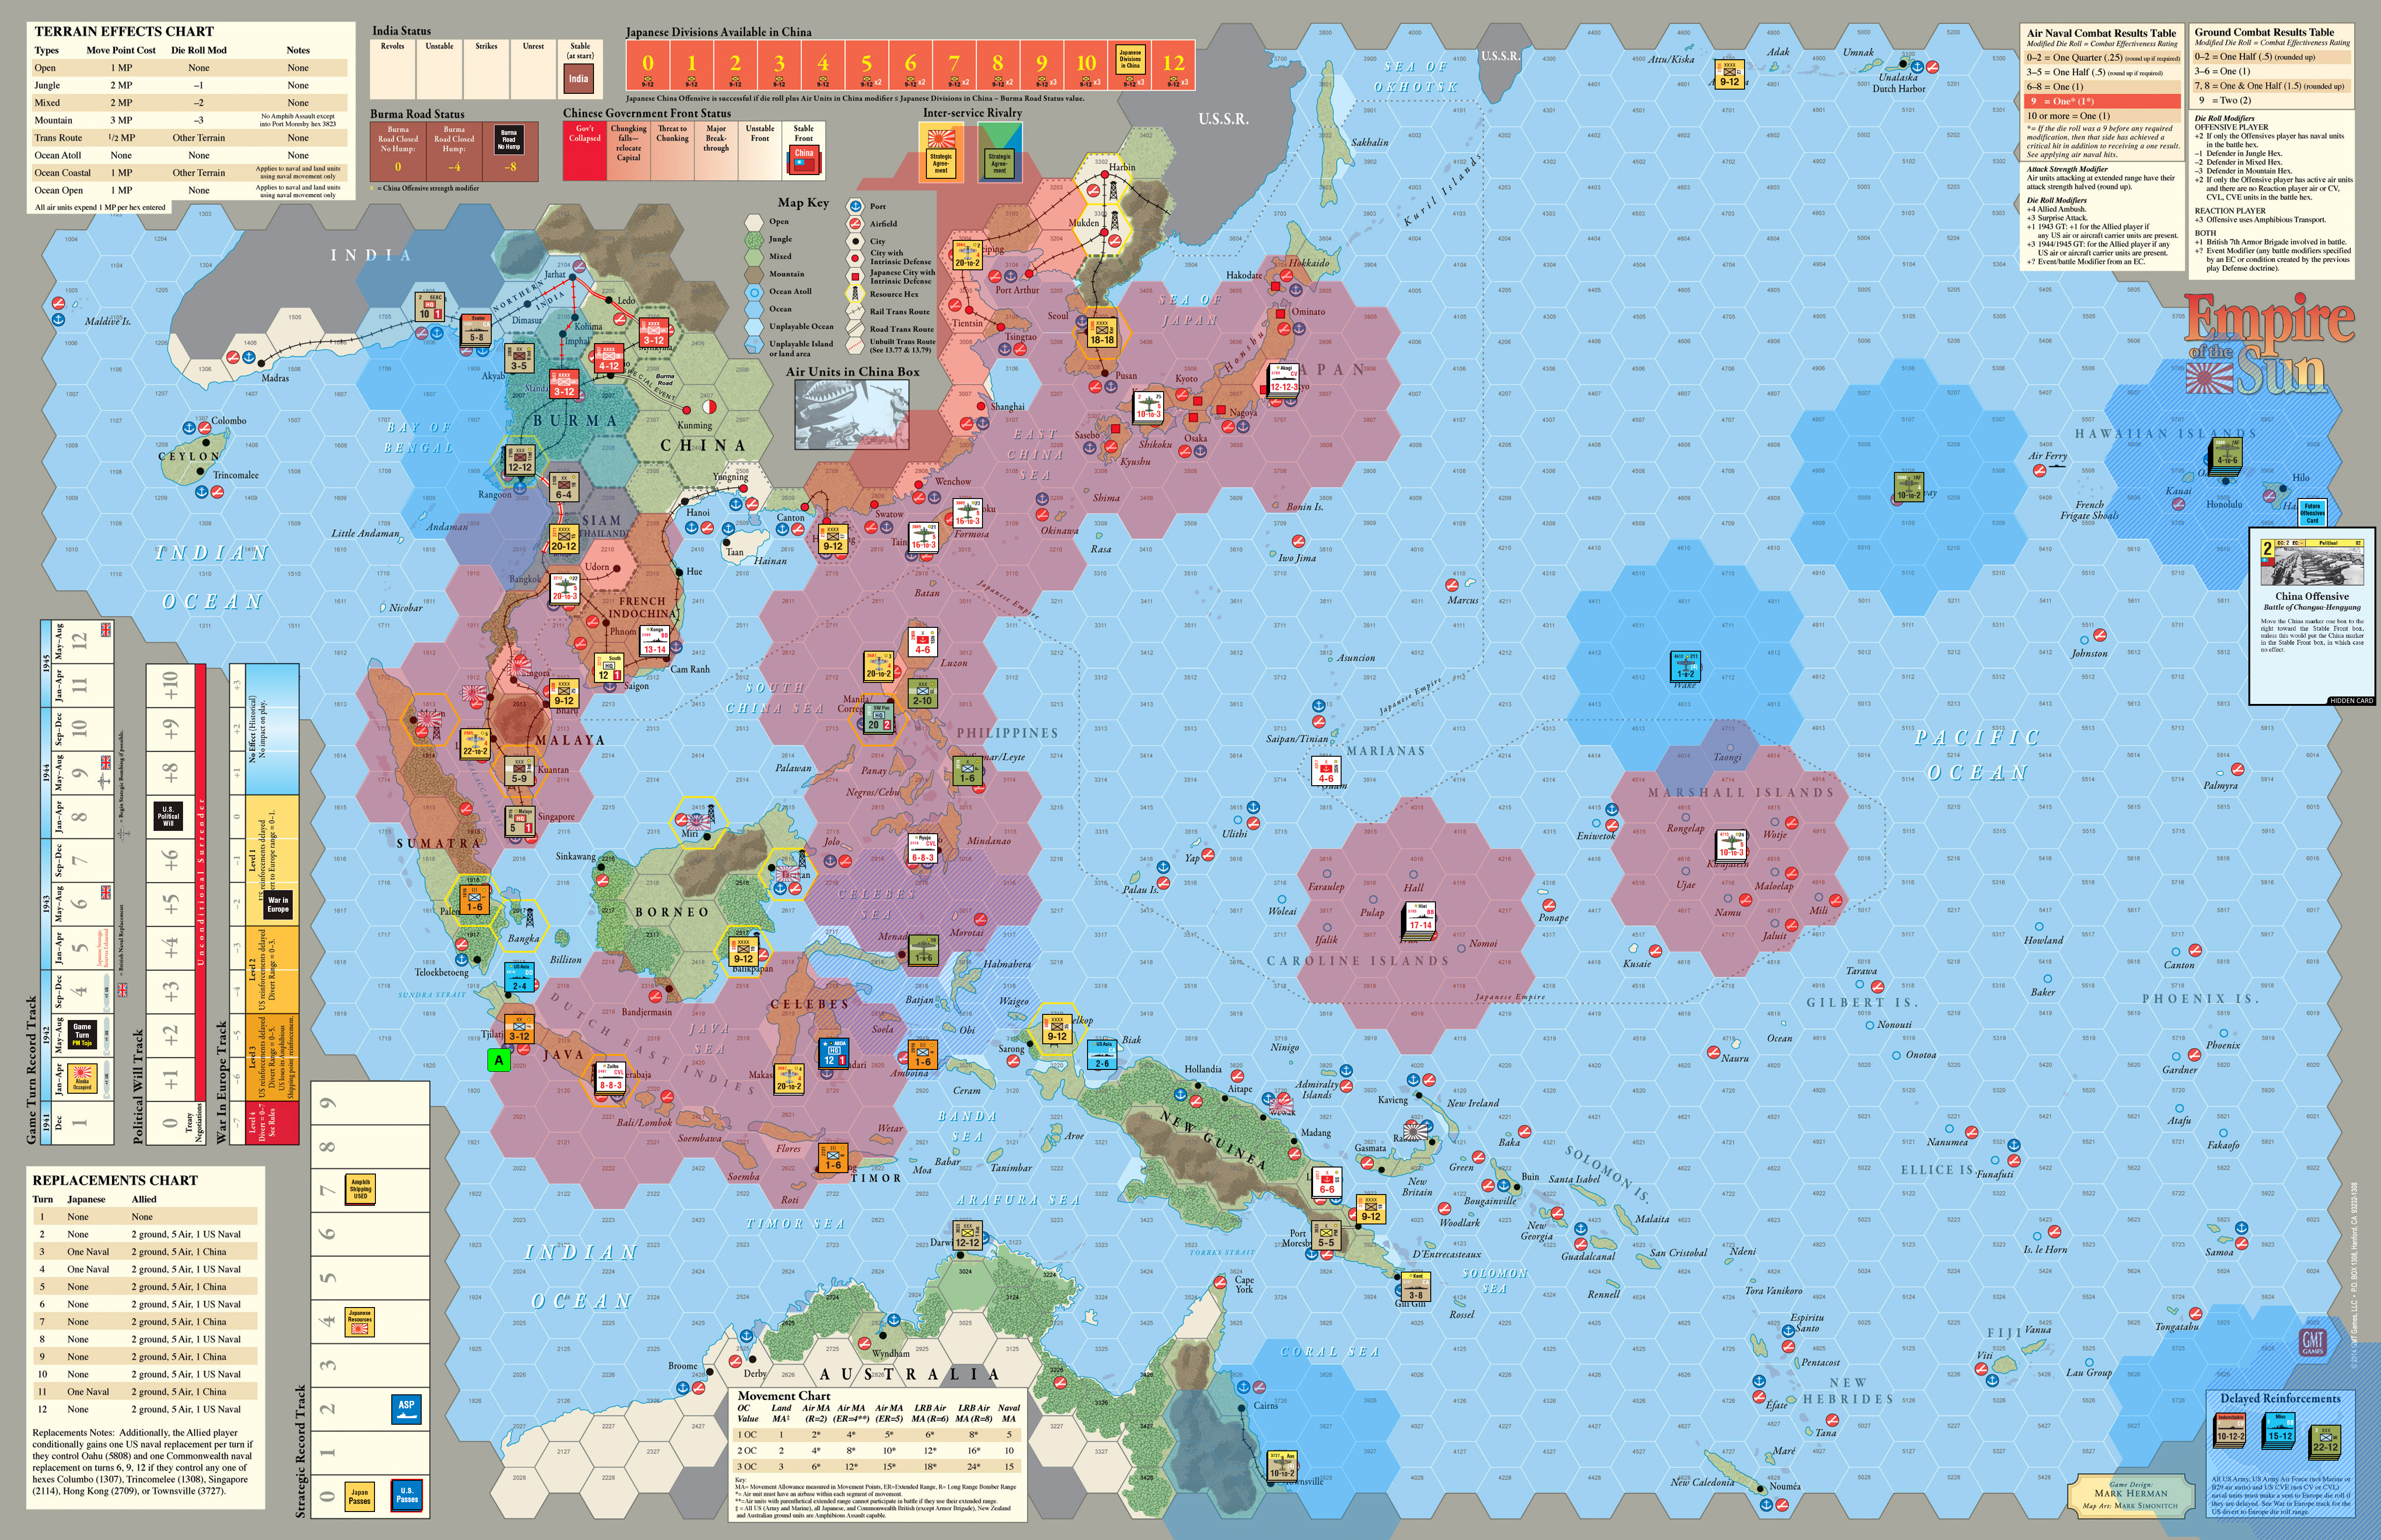
So far I’m intrigued by Erasmus. It’s a bit weird to get started, but once you have the hang of it, it even behaves (somewhat) logically.
Let’s see how turn 3 turns out (no pun).