Introduction
This is an After Action Report of a game of Empire of The Sun by Mark Herman. You can find the rules here, if you’re not familiar with it.
My opponent kindly gave me permission to publish our game here, which is much appreciated.
Setup
We agreed to use Vassal to start a PBEM (play by e-mail) game. Empire of The Sun plays very well as PBEM game, since planing a turn’s strategy can be time-consuming. It also eliminates the need to somehow store the game between sessions (a problem every wargamer faces). We will play the 1942 Campaign scenario:
WARNING: Some of the images show here are very large. Might cause some trouble when viewing on mobile devices.
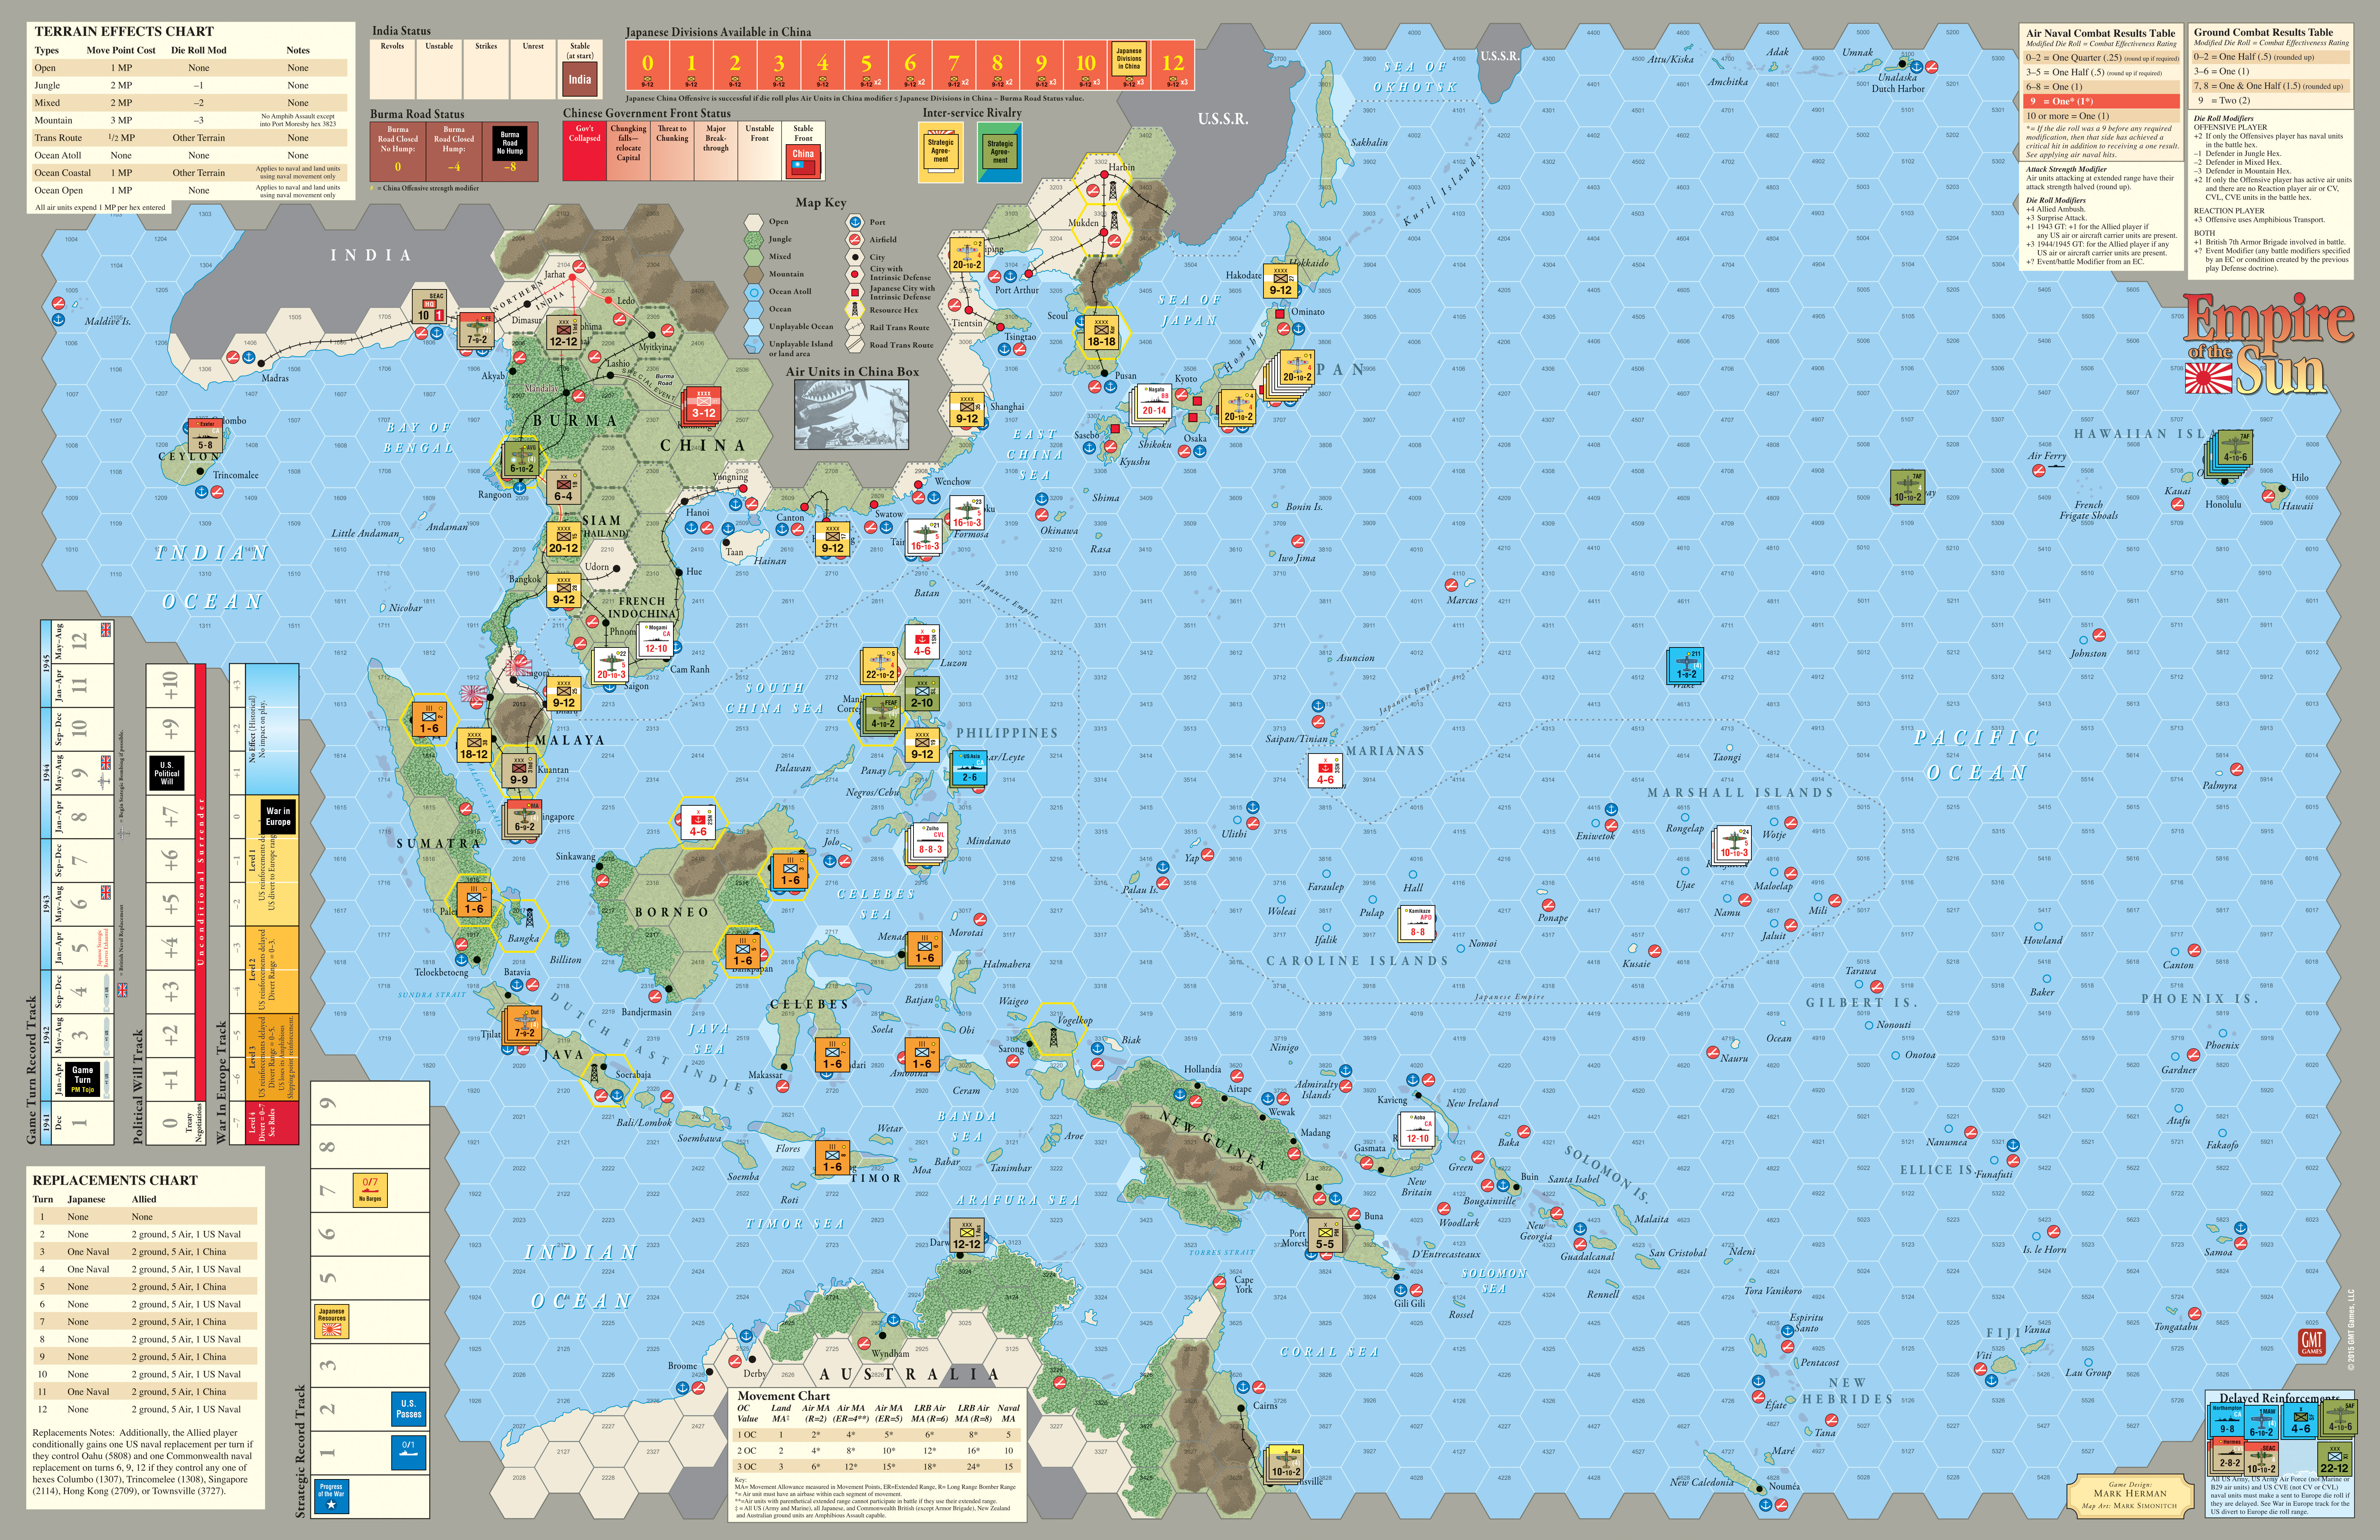
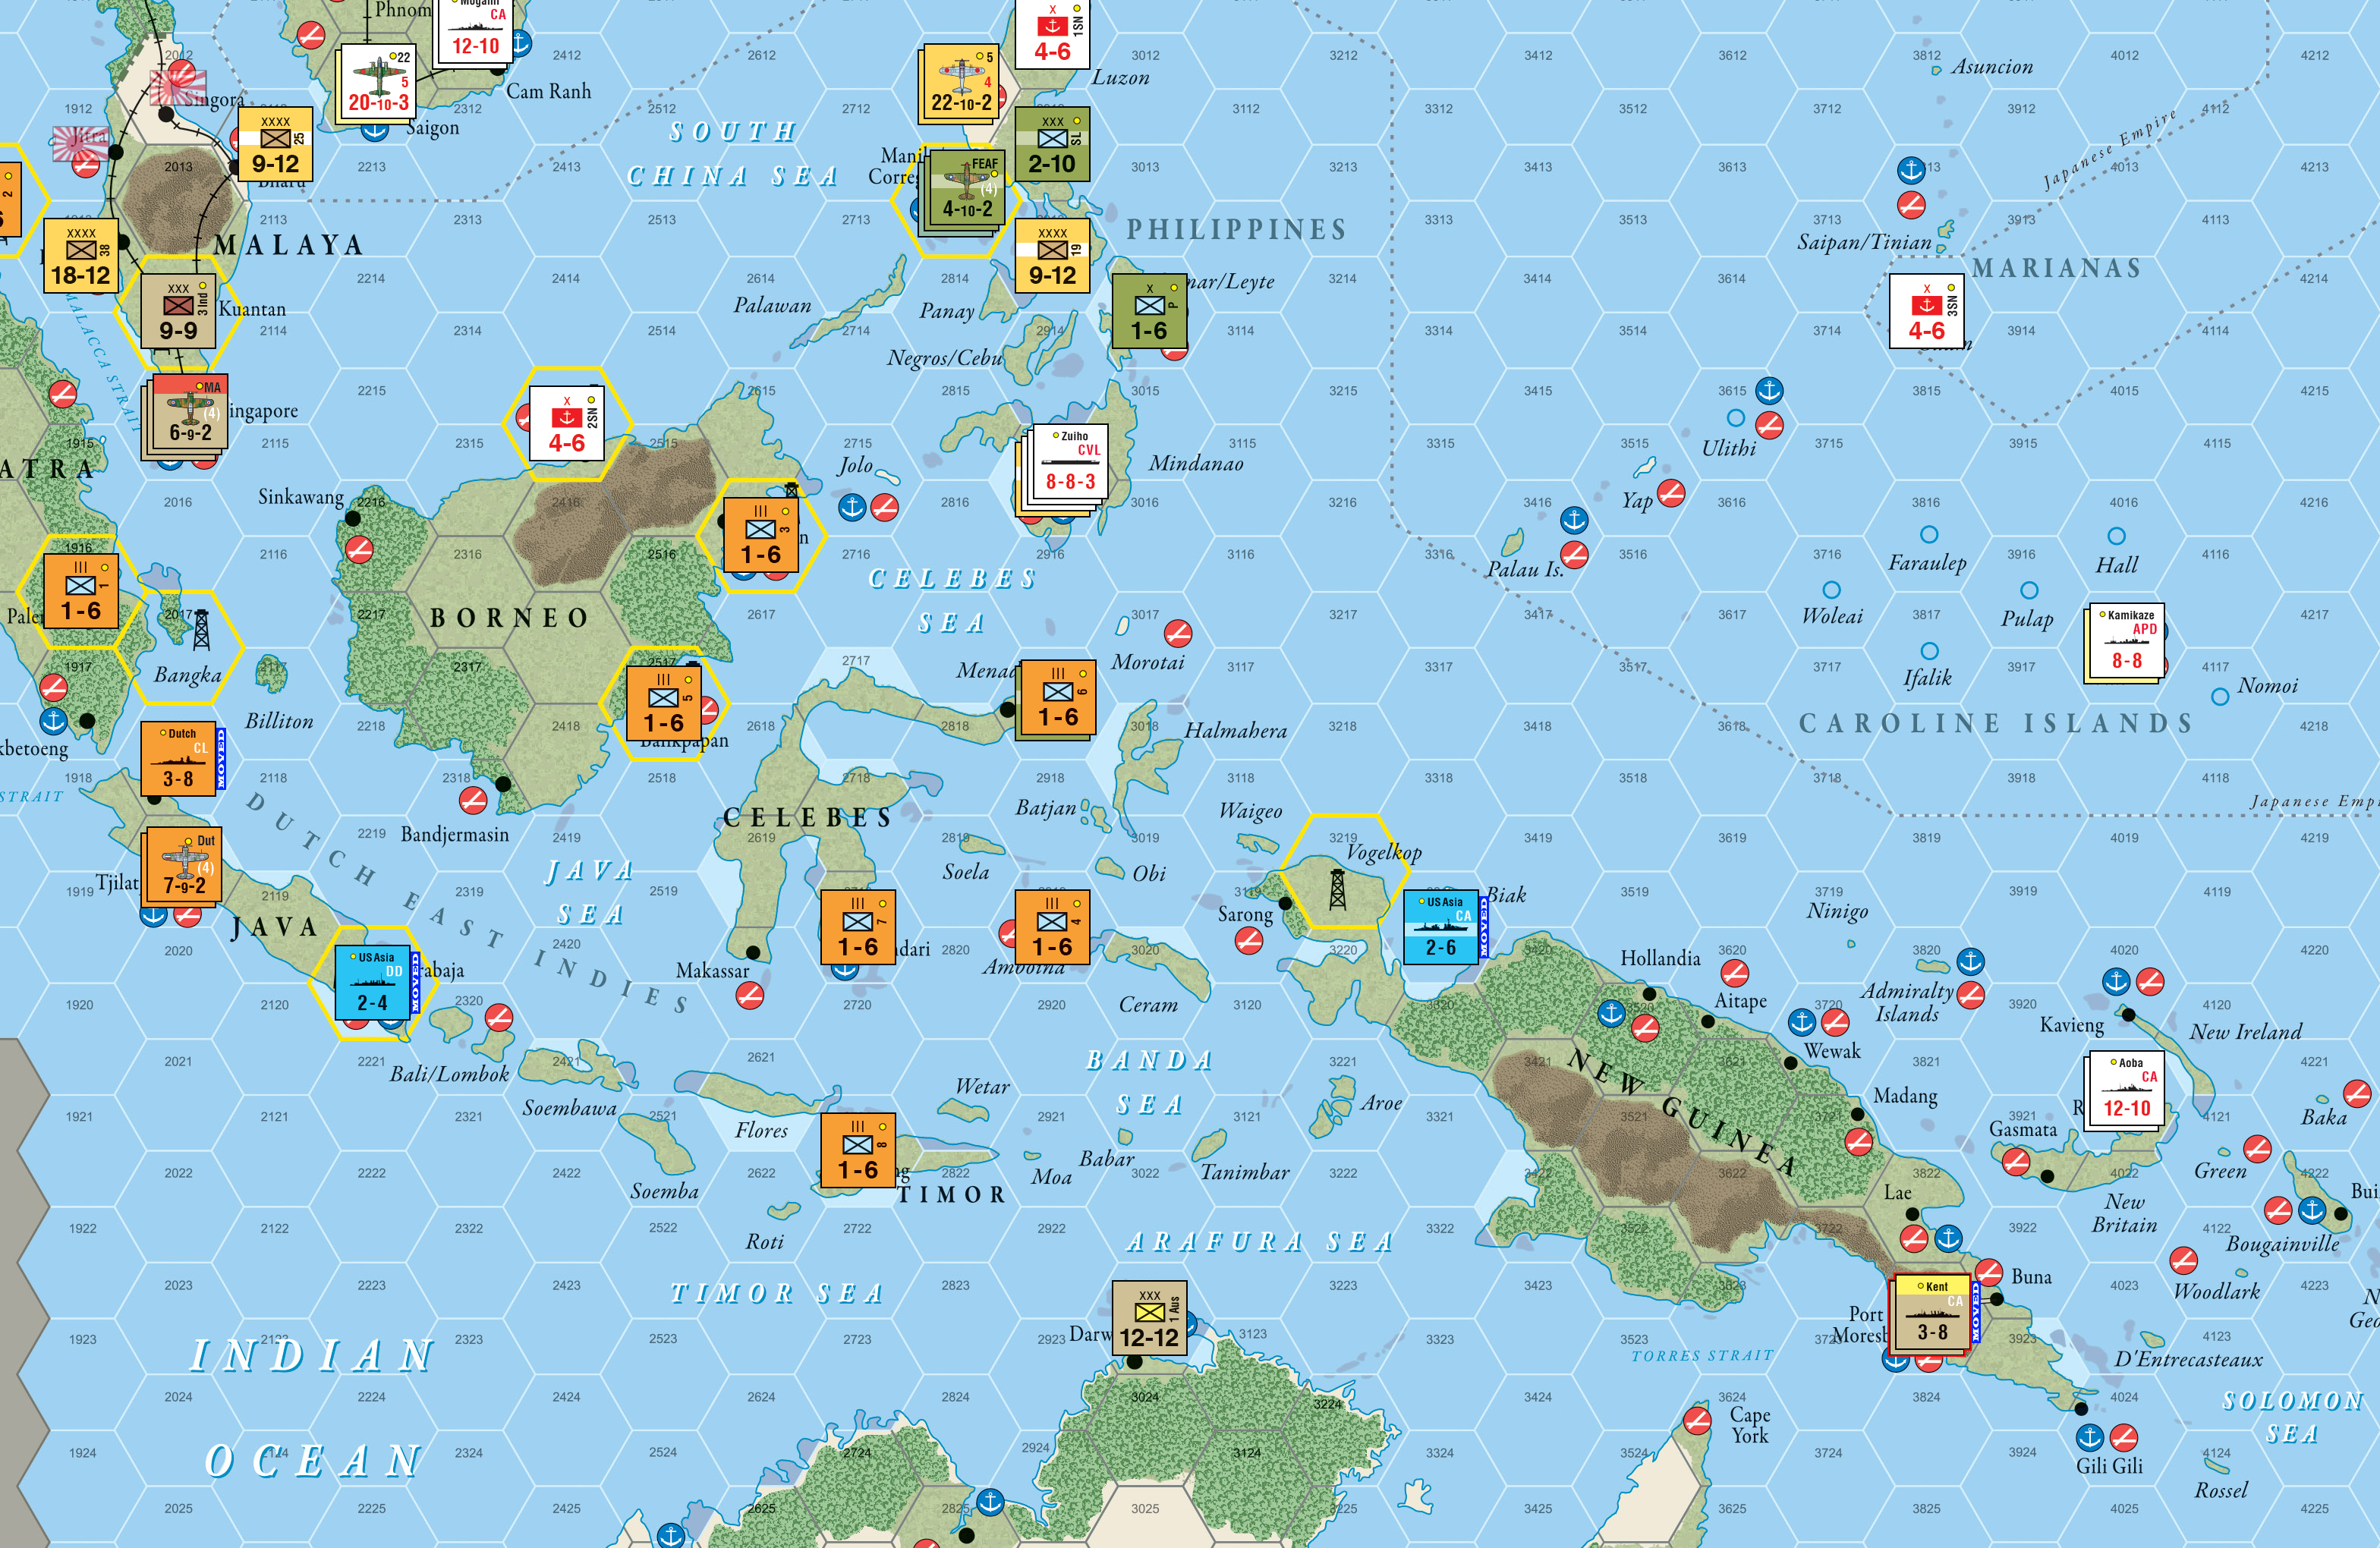
As per scenario rules, the Allies get free Naval Emergency Movements to open the game:
- CL Dutch to Batavia (2018)
- DD US Asia to Soerabaja (2220)
- [CA US Asia] to Biak (3319)
- CA Kent to Port Moresby (3823)
After the NEM, we draw our opening hands. I opt not to take the historical variant (which would give me three fixed cards and four random), so I draw seven random cards. My opponent did not opt for the ABDA card in turn 2.
Here’s the Japanese opening hand:
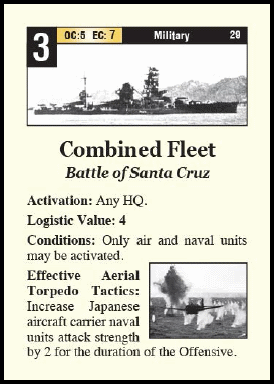
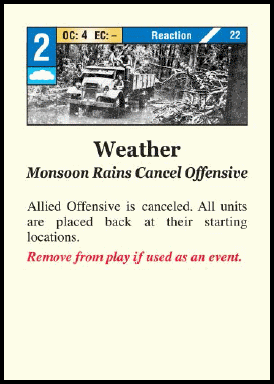
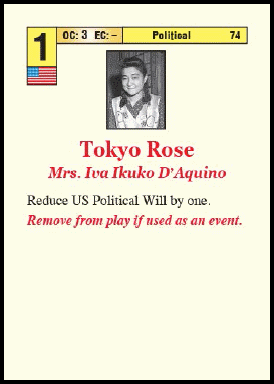
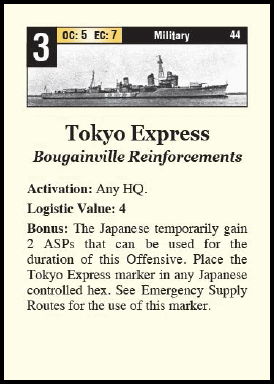
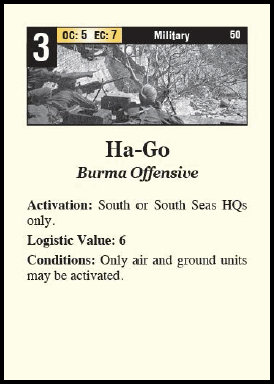
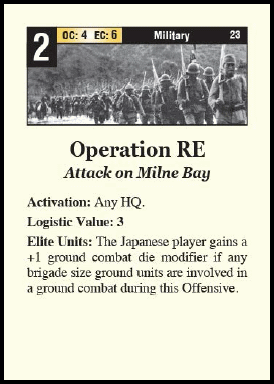
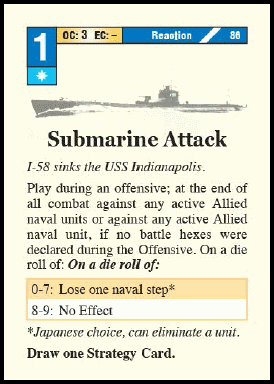
I get four offensive cards, one political card, and two reaction cards. Not a bad hand at all. The two reaction cards are a bit annoying this early for the Japanese, I hope my opponent will at least attempt one offensive, so I can play one of them to draw (hopefully) additional offensive card.
My general plan will be: Strike hard and vicious at the Dutch East Indies, then swing East with the goal to deny the Allies the opportunity to place the incoming HQs in the Solomon Islands or New Guinea. I basically want to
So, I believe this to be quite a decent opening hand that will let me wreak some serious havoc on my opponent in this turn.
Turn 2
If you’ve never played Empire of The Sun, don’t be confused, the 1942 Campaign Scenario starts with Turn 2. Turn 1 is basically only the attack on Pearl Harbor and the first strikes in the Dutch East Indies.
Japan Card 1: Tokyo Express (#44) as EC

I commence the festivities with a standard offensive: My goal is to take out the Allied air units in the Philippines, Malaya, and Dutch East Indies. This will prevent the Allies player from activating his HQs in Manila and Singapore (for a while at least). I activate the Combined Fleet HQ in Kure (3407) for 3 + 4 = 7 activations.
Activations and Movements: Combined Fleet HQ for 7 activations
- The 3rd and 4th Air Division move from Nagoya (3407) to Aparri (2911). They’ll attack Manila (2813); Manila will be a battle hex.
- The [16th Army], CA Nachi, and CVL Ryujo move from Davao (2915) to invade Soerabaja (2220). Soerabaja is another battle hex.
- The 22nd Air Fleet moves from Saigon (2212) to Kota Bharu (2112) to attack Singapore (2015); Singapore will be a battle hex.
- CA Mogami moves from Cam Ranh (2311) to Batavia (2018) to attack the Dutch fleet, so another battle hex.
I use one of the two additional ASPs the card event grants me.
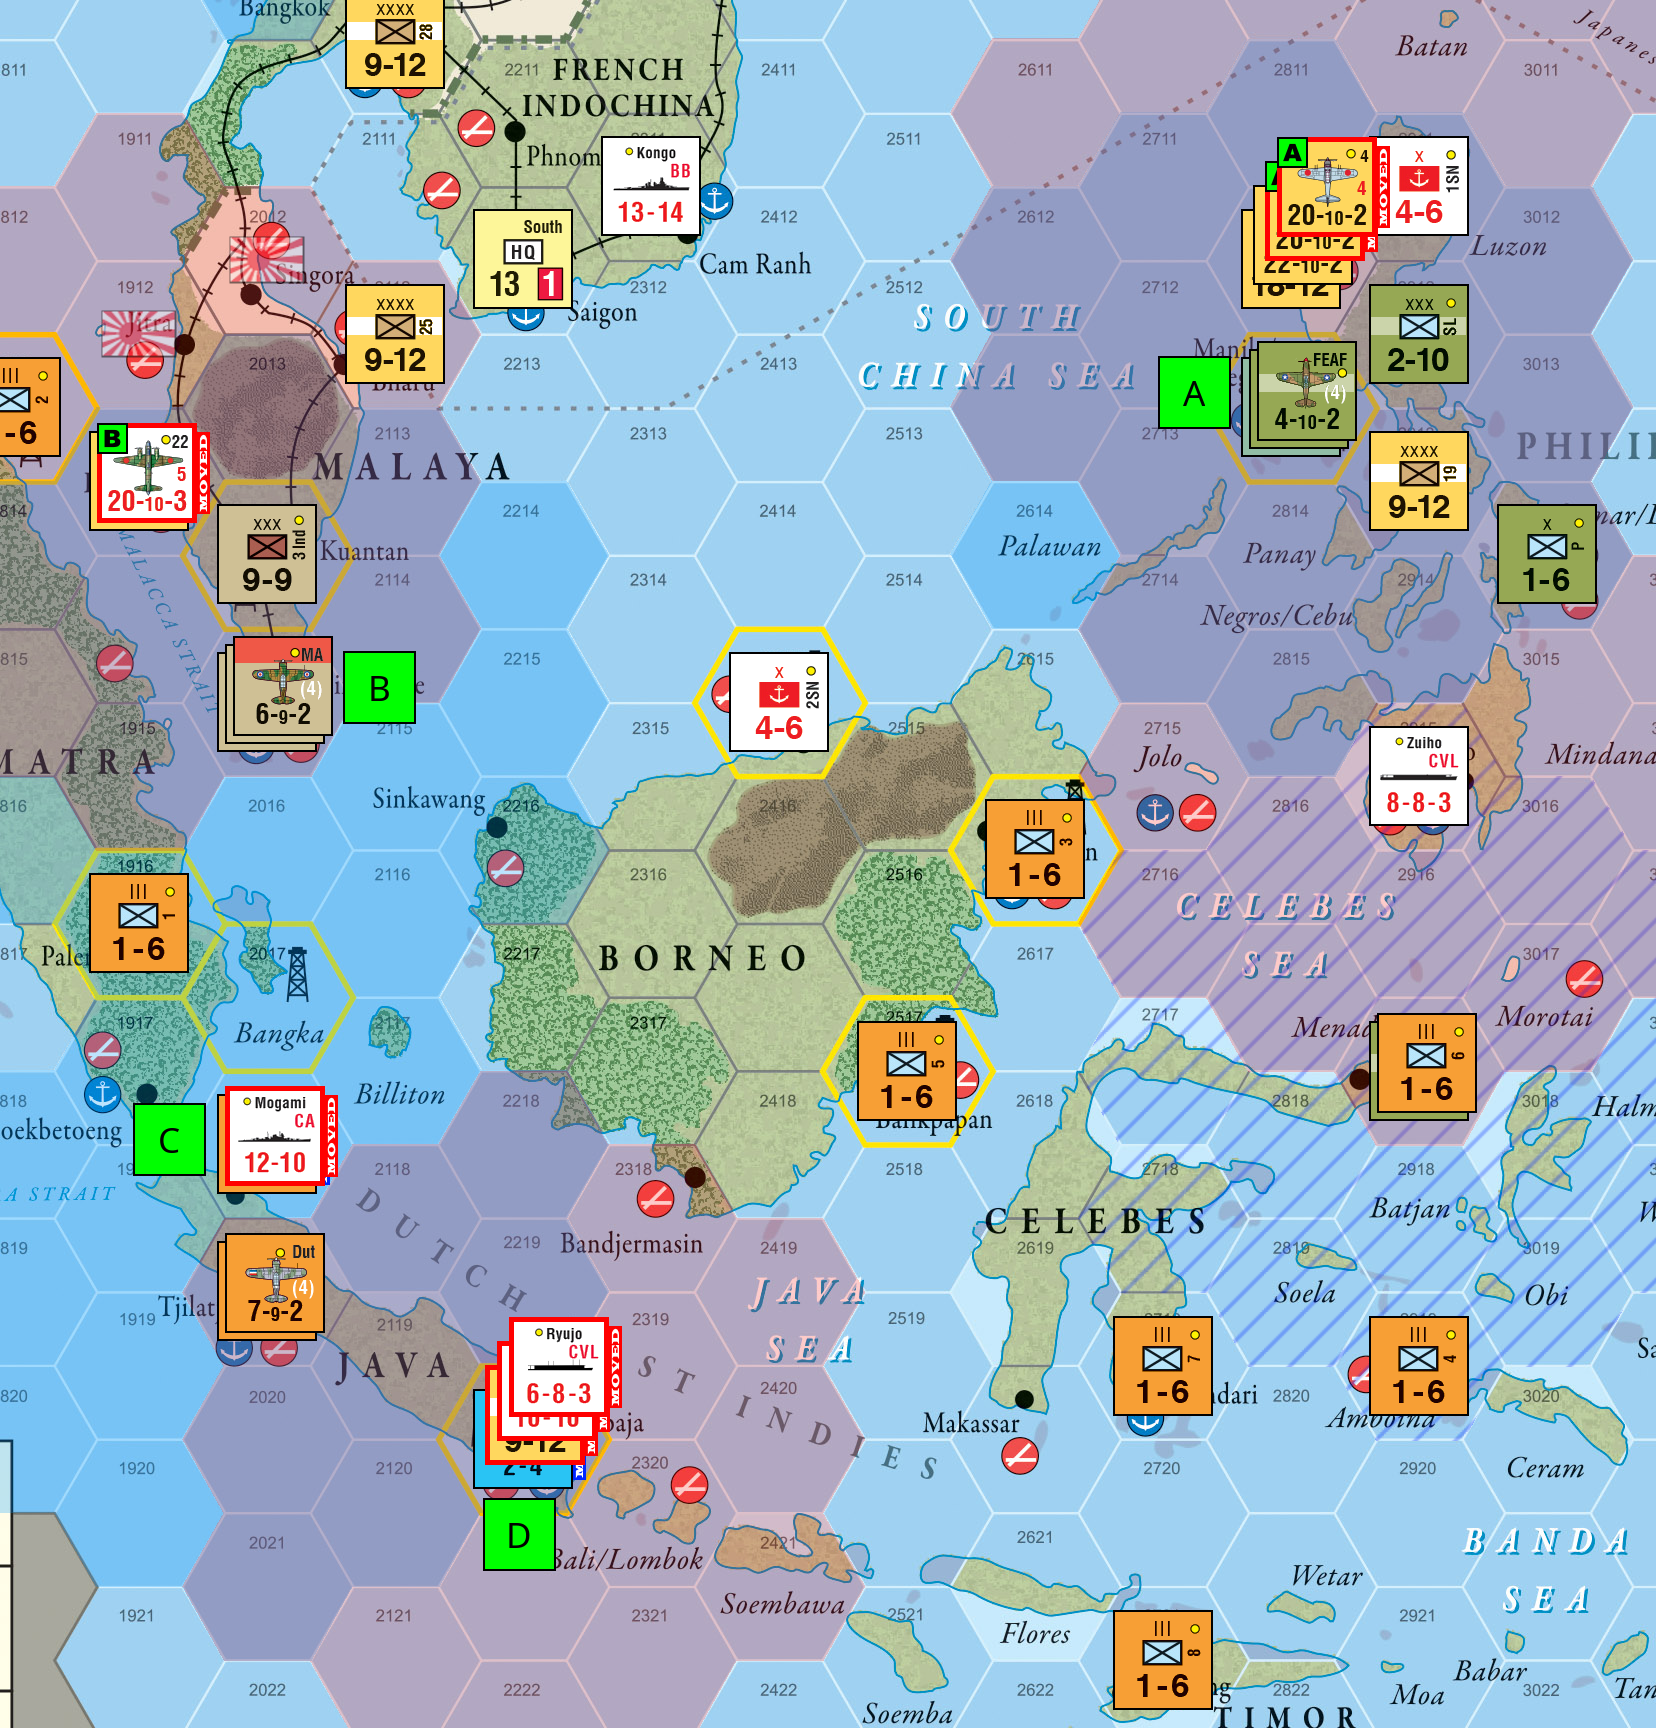
Reactions: The Allies opt for an intel roll: 2. So the intelligence status changes to Intercept.
Battle Resolution: There are four battle hexes to resolve:
- Manila (A): Japan 40 vs. Allies 4. Japan roll: 8 for 40 hits, Allies roll: 7 for 4 hits. Japan destroys the FEAF air unit (30 hits lost), Allies don’t have enough hits to reduce any Japanese unit (4 hits lost).
- Singapore (B): Japan 20 vs. Allies 9. Japan roll: 7 for 20 hits, Allies roll: 9 for 9 hits and a critical hit. Japan reduces and destroys MA air unit for 18 hits (2 hits lost), Allies score one step loss on the [22nd Air Fleet] with the critical hit.
- Batavia (C): Japan 12 vs. Allies 3. Japan roll: 2 for 3 hits, Allies roll: 7 for 3 hits. No side has enough hits, so no effect. Technically, an Allied victory.
- Soerabaja (D): Japan 16 vs. Allies 2. Japan roll: 1 for 4 hits, Allies roll: 4 for 1 hit. [DD US Asia] takes one step loss. Japan is victorious so the Amphibious Assault can proceed unopposed, Soerabaja is captured.
Post Battle Movement: The Allies have no active unit eligible for PBM, so Japan conducts PBM next.
- CA Mogami retreats back to Cam Ranh (2311)
- CA Nachi moves to Miri (2415)
- 4th Air Division moves to Bangkok (2110)
- 3rd Air Division moves to Davao (2915)
[DD US Asia] conducts Emergency Naval Movement to Kendari (2719).
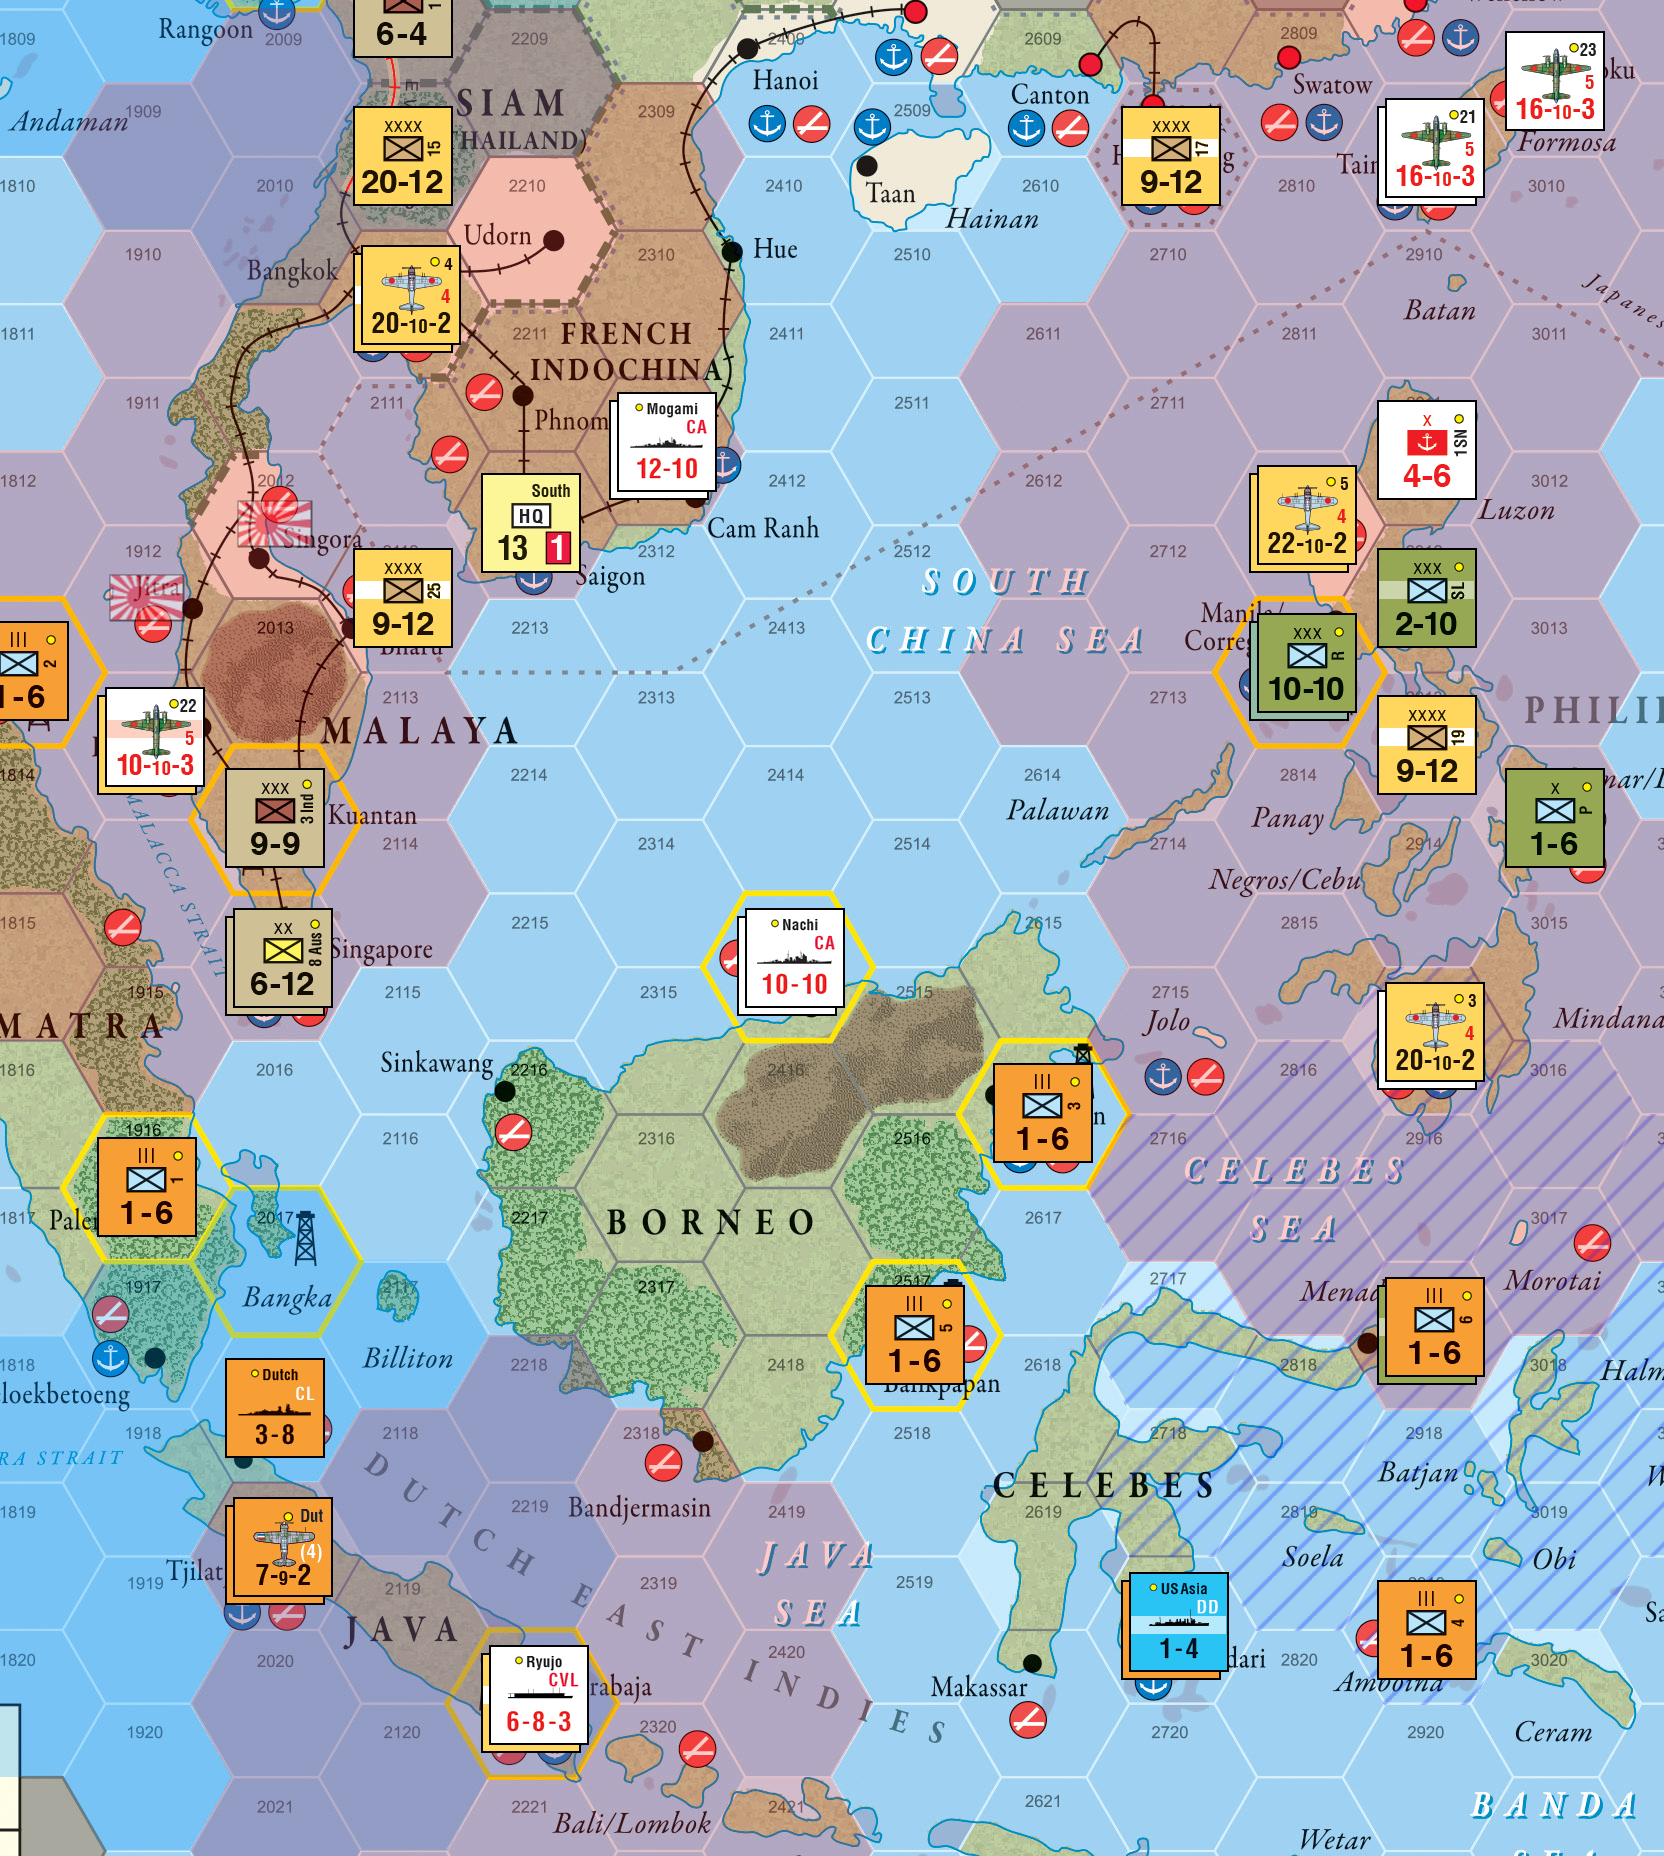
My first offensive was quite effective. I took out two Allied air units, took one resource hex, and suffered only one step loss myself. Both Allied HQs in the Dutch East Indies are neutralized. Good first offensive.
Note: Here happend a small oversight on my part: I forgot to place the Tokyo Express marker. But it wouldn’t had an effect on the rest of the turn. So no harm done here.
Let’s see the Allies’ answer.
Allies Card 1: Curtis LeMay (#67) as OC
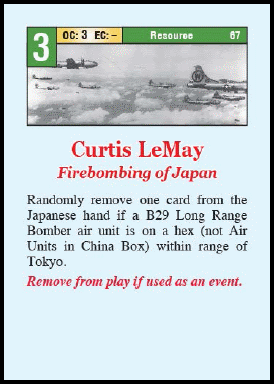
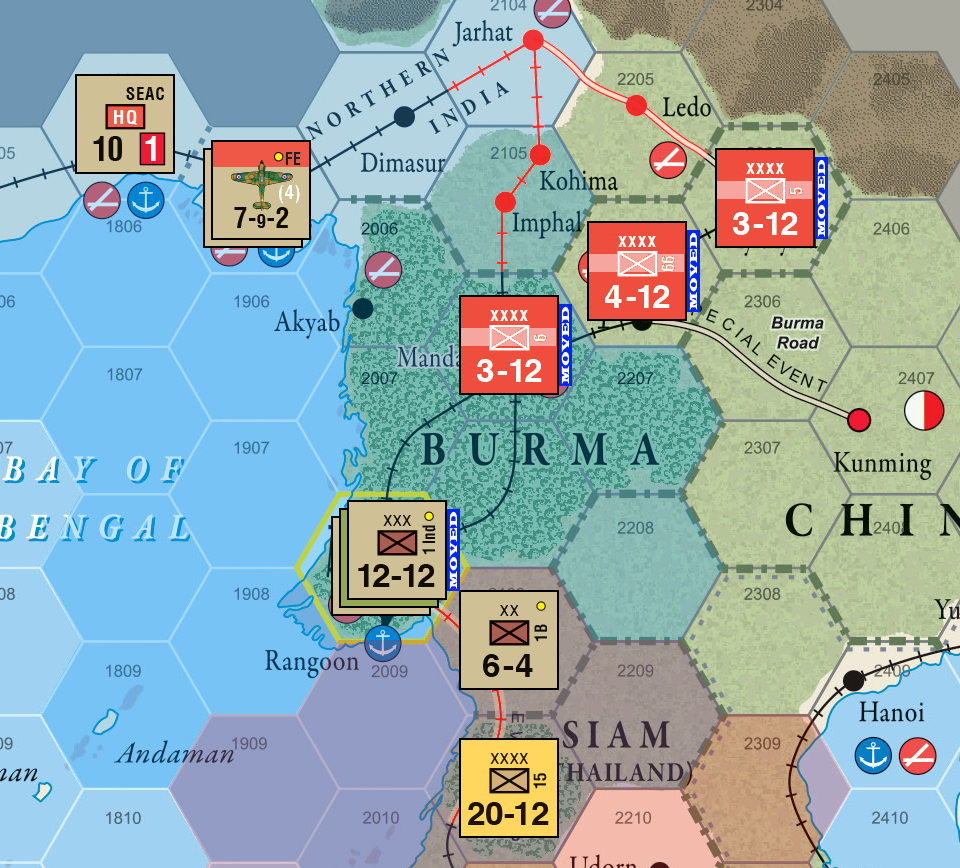
The Allies activate SEAC HQ in Calcutta (1807) for 4 activations. These 4 units move into Burma to reinforces their defenses there. Smart.
Japan Card 2: Operation RE (#23) as EC

My first offensive went smoothly, so I’ll try to keep up the momentum and continue to push into the Dutch East Indies.
Activations and Movements: Combined Fleet HQ for 6 activations
- 2nd Naval Brigade and CA Nachi invade Biak (3319), this will be a battle hex.
- CVL Zuiho moves to hex 2716 and attacks [US Asia] in Kendari (2719); this is a smoothering attack to prevent the Allies from reaction to my other invasions. This will be a battle hex.
- The [19th Army] invades Balikpapan (2517). Battle hex.
- The [17th Army] invades Tarakan (2517). Battle hex.
- The [25th Army] invades Palembang (1916). Battle hex.
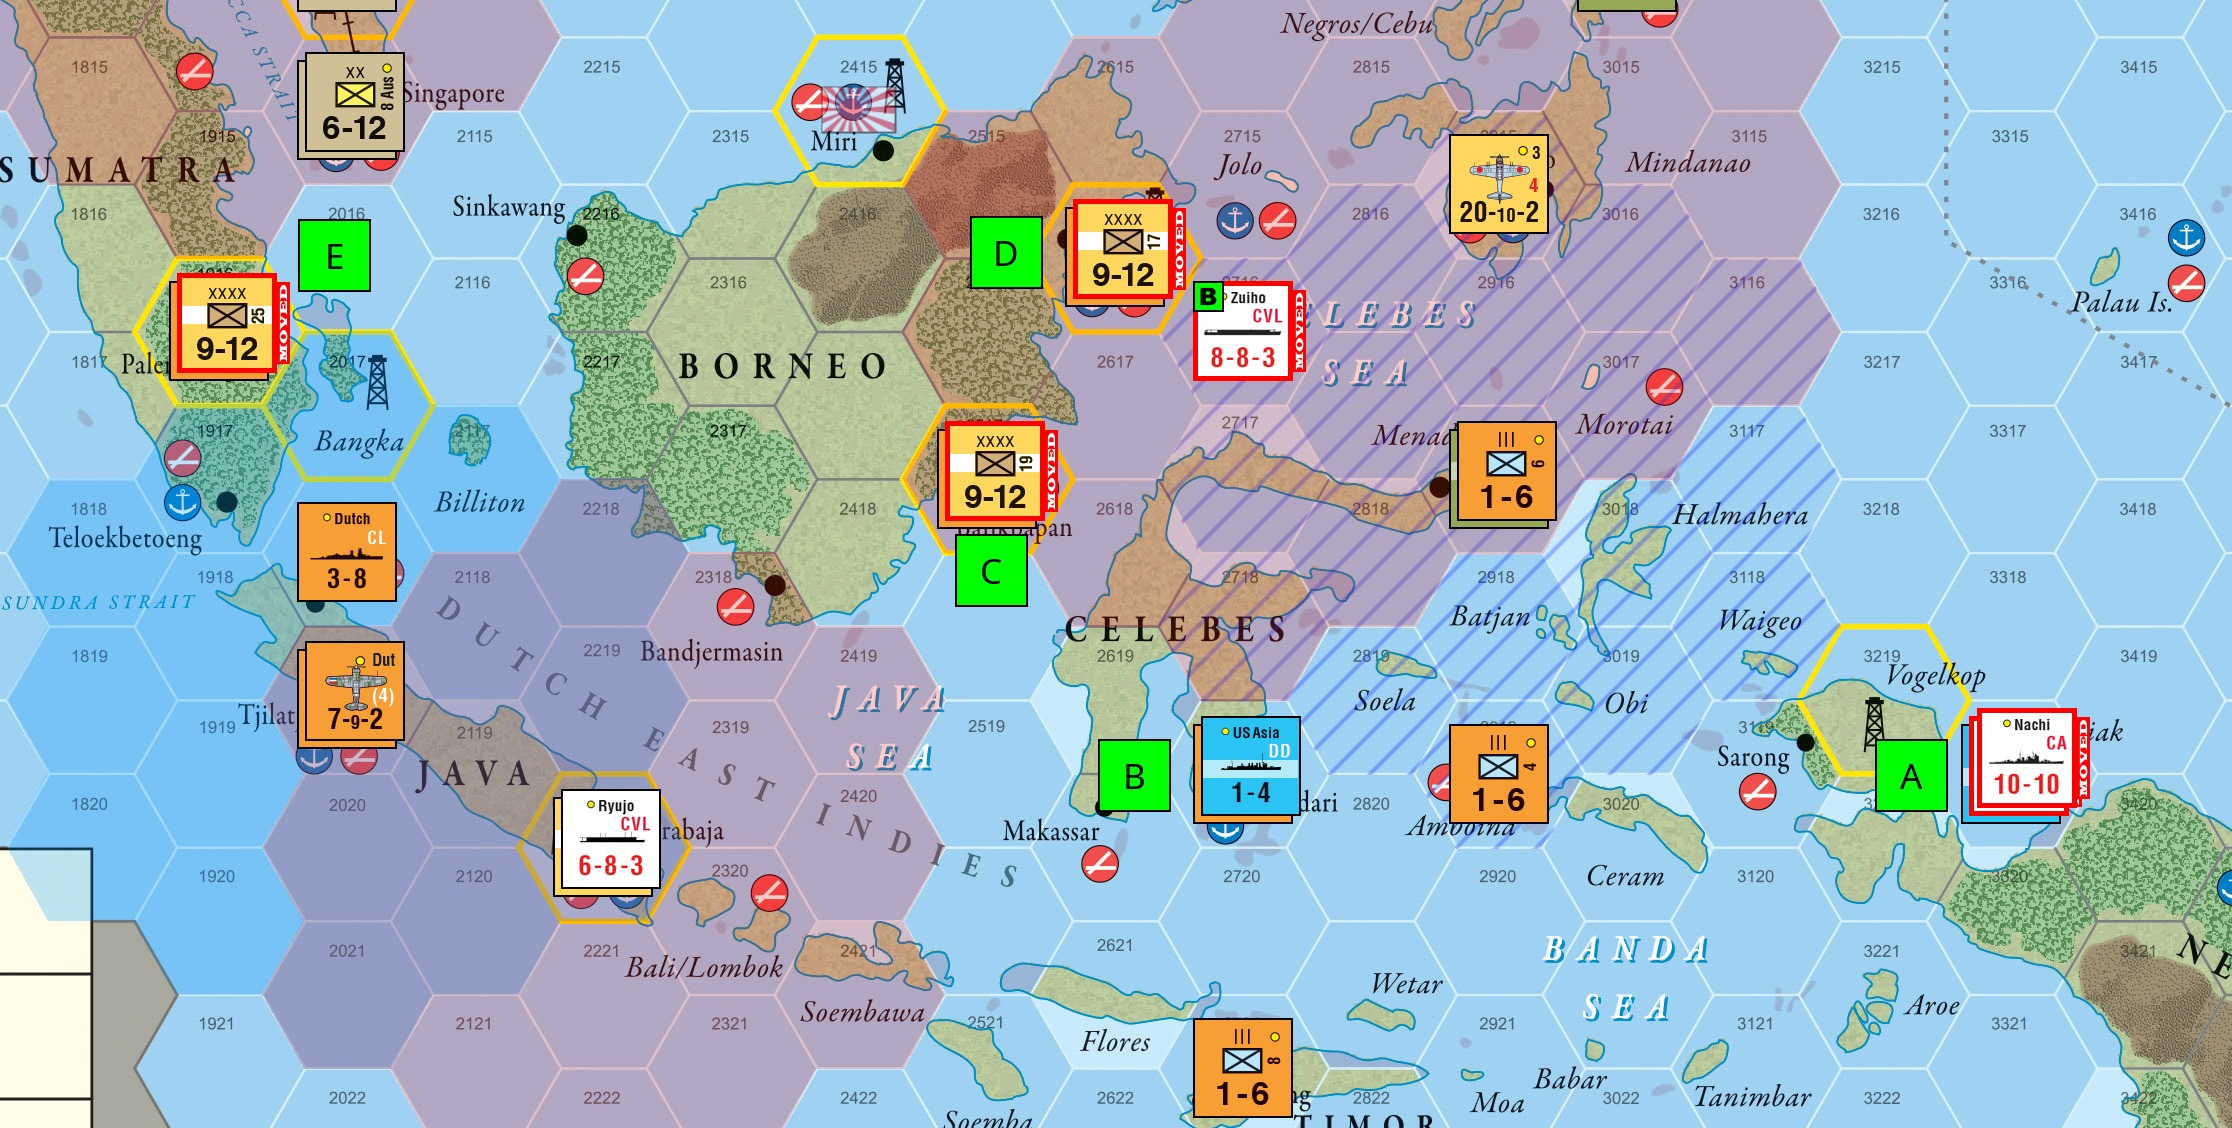
I want to take advantage of the fact that by playing a 2-points card no Allied unit has the range (10 hexes) to reach any of my invasion units.
Let’s see how these battles turn out.
Reactions: The Allies opt for an intel roll: 0. So the intelligence status changes to Intercept. They activate no reaction units, since there’s no HQ in supply that could activate the CA Kent in Port Moresby (3823); and wouldn’t be able to reach any of my invasions, except for Biak, but wouldn’t change a thing; the Allies still need a critical hit to prevent the invasion. So, my plans working…so far.
Battle Resolution: There are five battle hexes to resolve:
- Biak (A): Japan 10 vs. Allies 2. Japan roll: 1 for 3 hits, Allies roll: 4 for 1 hit. No effect, but Japan wins with more remaining total Attack Factor, so the invasion is successful. Japan captures Biak.
- Kendari (B): Japan 8 vs. Allies 1. Japan roll: 0 for 3 hits, Allies roll: 9 for 1 hit and a critical hit. No effect, since the Allies have no air units or carriers present to apply the hit to my carrier. Lucky!
- Balikpapan (C): Japan 9 vs. Allies 1. Japan roll: 8 for 18 hits, Allies roll: 3 for 1 hit. The Dutch 5th Regiment is eliminated, Japan captures Balikpapan.
- Tarakan (D): Japan 9 vs. Allies 1. Japan roll: 1 for 5 hits, Allies roll: 7 for 2 hits. The Dutch mount a successful defense, the invasion is turned back.
- Palembang (E): Japan 9 vs. Allies 1. Japan roll: 5 for 9 hits, Allies roll: 0 for 1 hit. The Dutch 1st Regiment is eliminated, Japan captures Palembang.
Note: We ignored the +3DRM for the defender, since it wouldn’t have changed anything; the question was whether the invaders produce enough hits to eliminate the Dutch units.
Post Battle Movement: The Allies have no active unit eligible for PBM, so Japan conducts PBM next.
- The [17th Army] and CVL Zuiho retreat to Davao (2915)
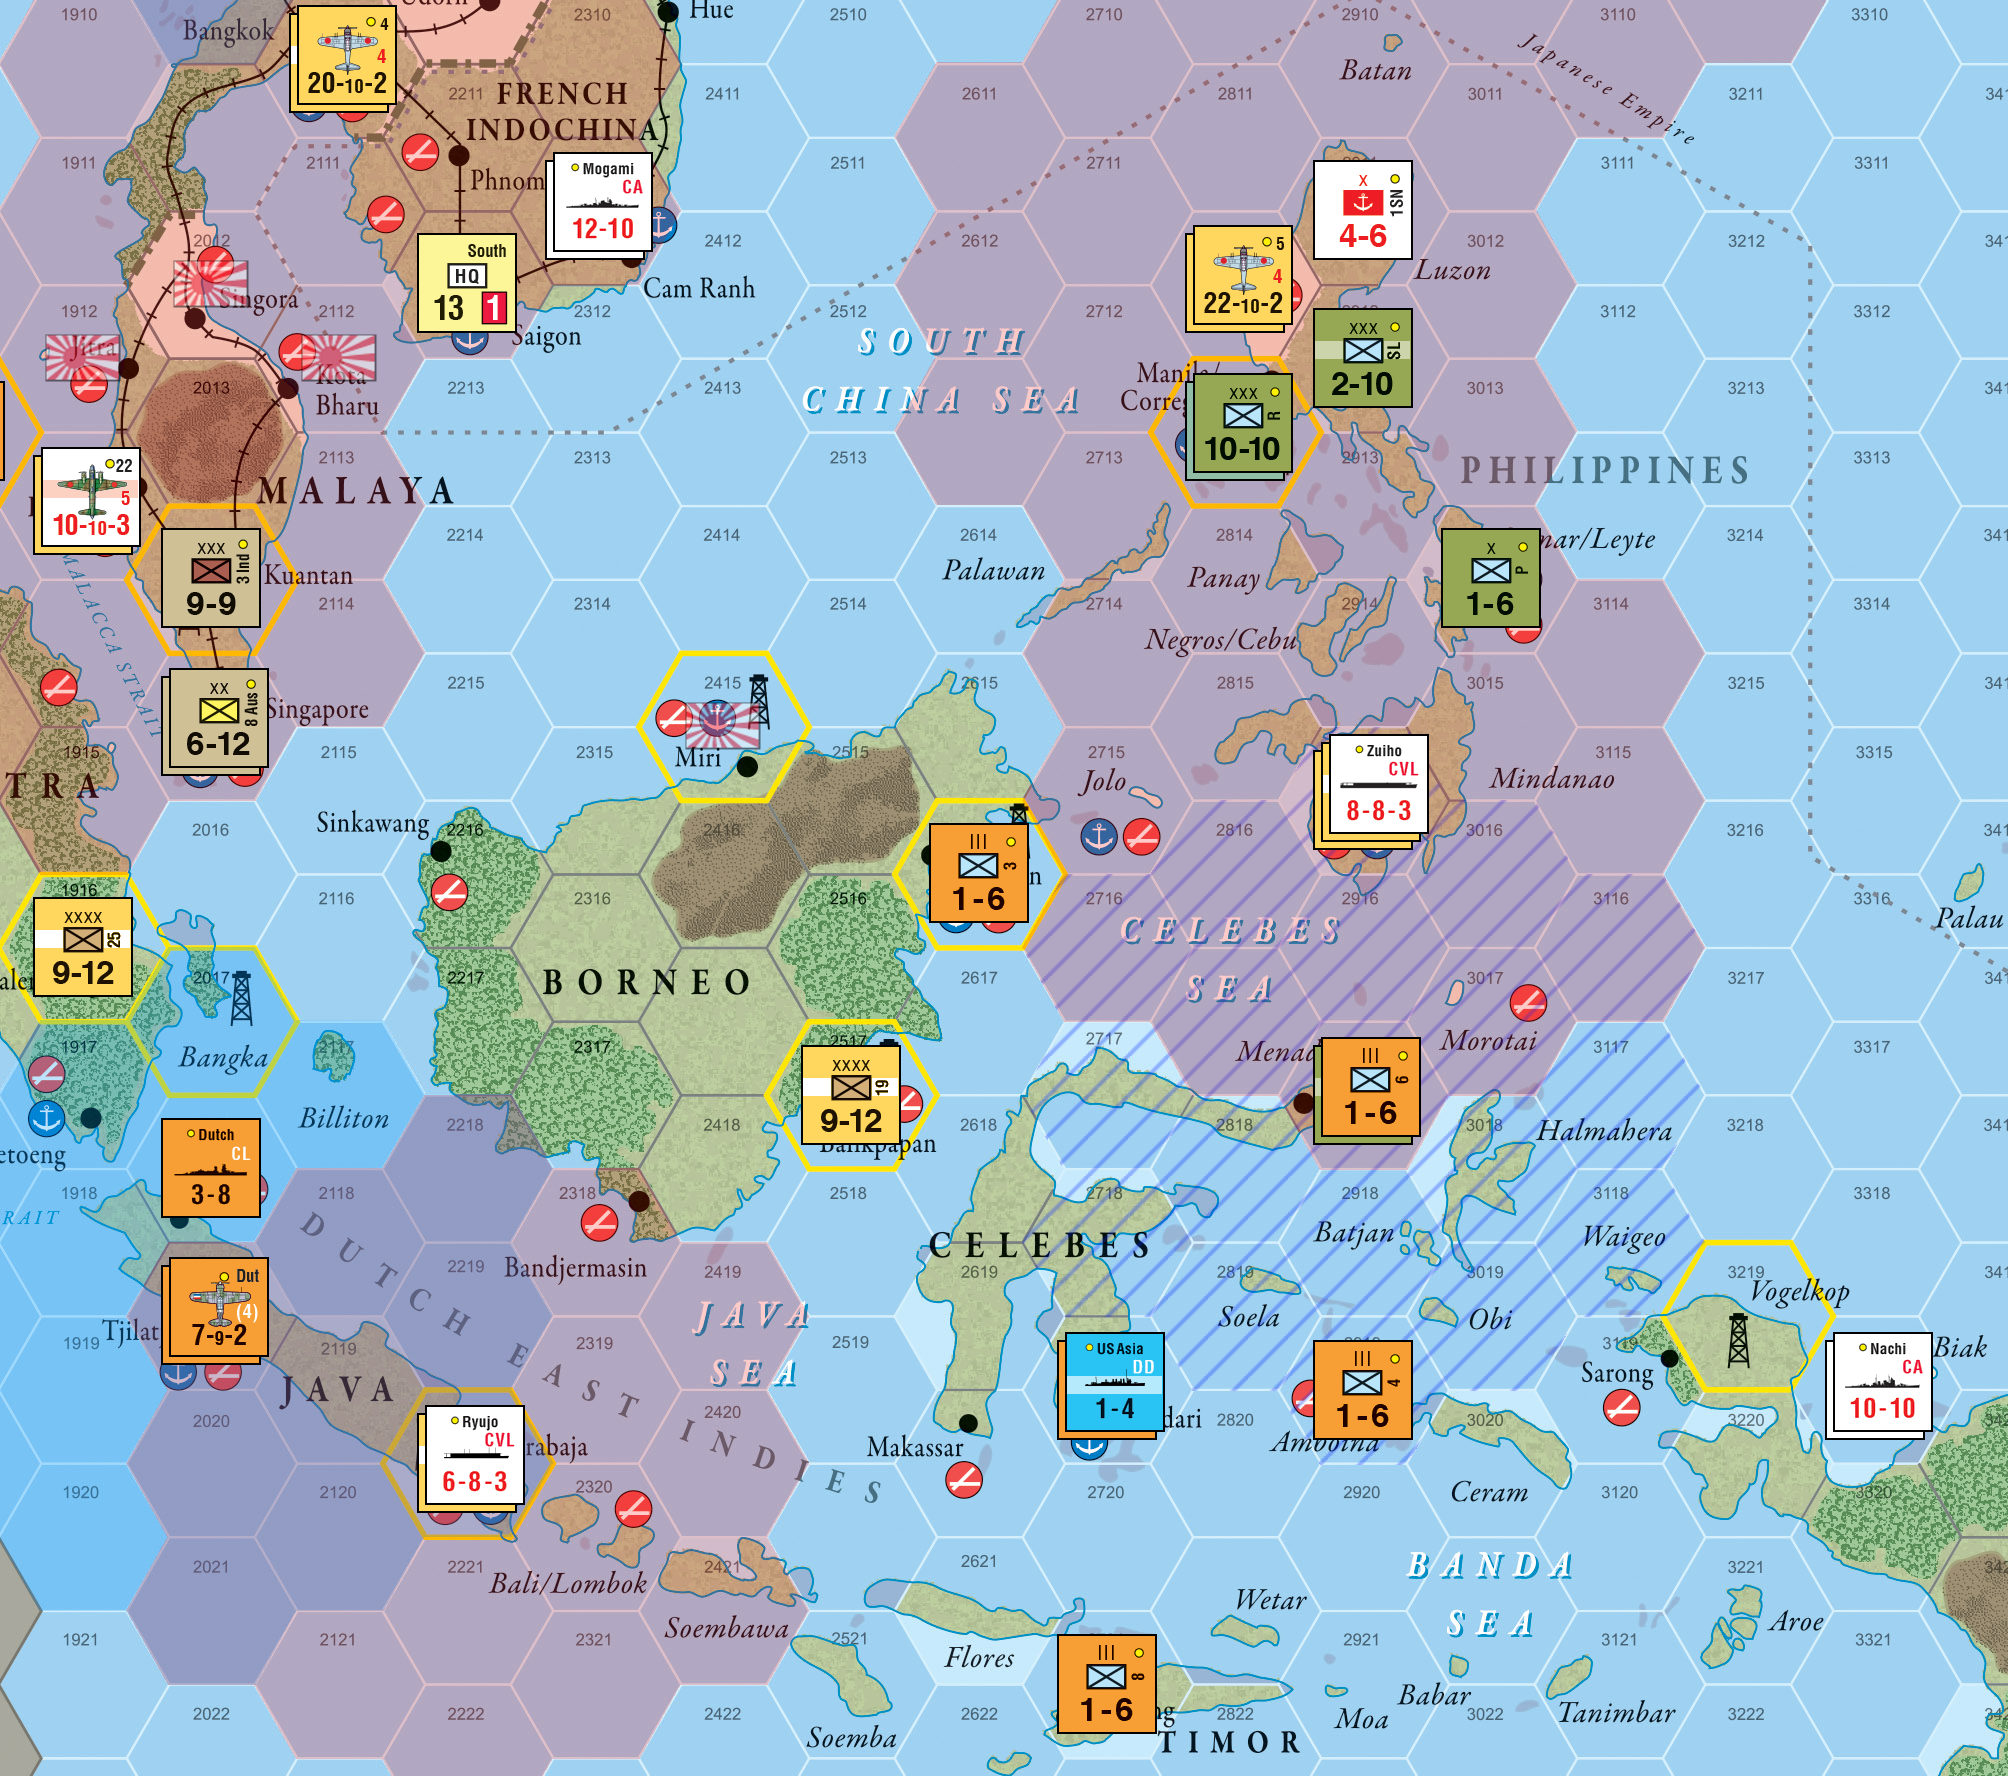
I took two more resources hexes. The harbor and airfield in Biak will give me a good base to move further into New Guinea. My goal here is to take enough airfields so I can cover all harbors with my air units. The ultimate goal here is to deny placement options for HQs and the beginning of the next turn.
Allies Card 2: Pass
The Allies pass.
Japan Card 3: Weather (#22) as OC

I use one of my reaction cards to move my units into the South Pacific in preparation for future offensives.
Activations and Movements: Combined Fleet HQ for 5 activations
- 2nd Naval Brigade uses the lack of air cover over Gili Gili (4024) for a sneak invasion.
All others use Strategic Movement:
- The 25th Air Fleet moves to Rabaul (4021)
- The 23th and 21th Air Fleets move to Truk (4017)
- The 2nd Air Division moves to Taihoku (3009)
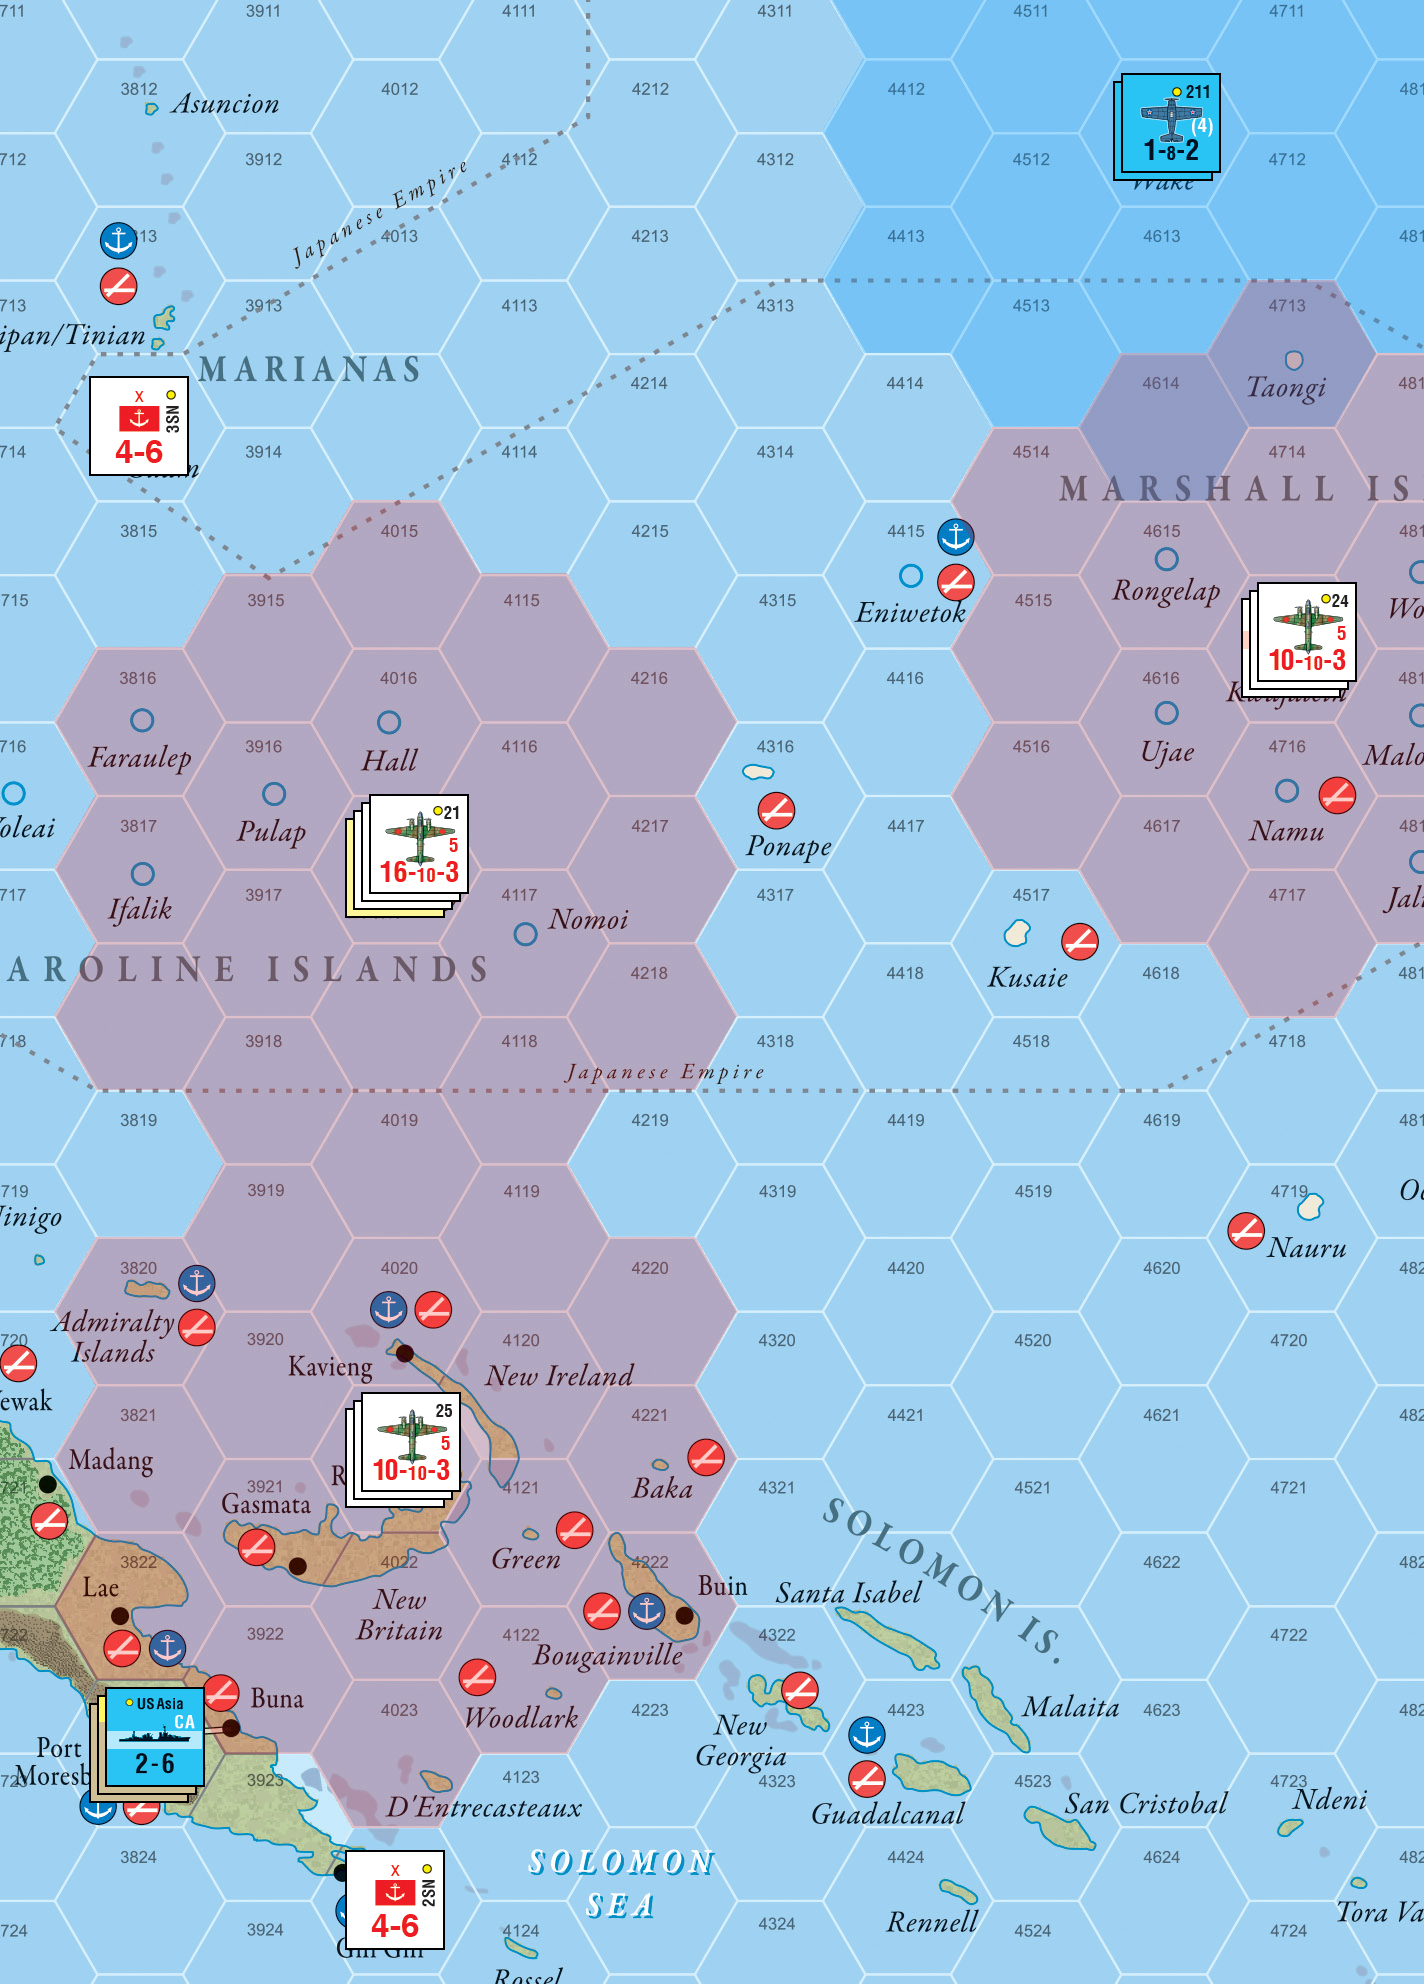
There is no battle hex, so no reaction here. Japan takes Gili Gili. This airfield will let me cover Port Moresby with air units.
Allies Card 3: Mao Tse Tung (#77) as OC
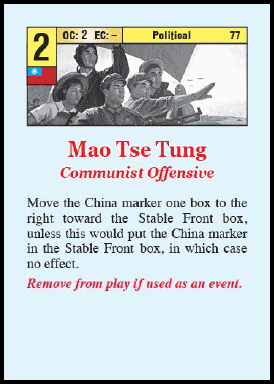
The Allies find it prudent to forward-deploy their carriers, probably to dissuate me from attacking/invading Port Moresby (spoiler: it did).
Activations and Movements: Central Pacific HQ for 2 activations
All use Strategic Movement:
- CV Enterprise and CV Lexington move from Oahu (5808) to Viti (5325)
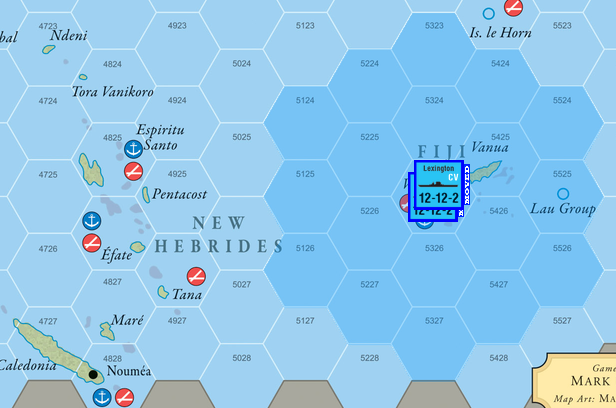
There is no battle hex, so no reactions here.
Japan Card 4: Kamikaze Attacks (#66) as OC

I react to the Allies’ forward deployment with one of my own.
Activations and Movements: Combined Fleet HQ for 5 activations
- [18th Army] and BB Hiei invade Wake Island (4612)
- CV Akagi, CV Shokaku, and CV Soryu move to hex 4313 to support the invasion
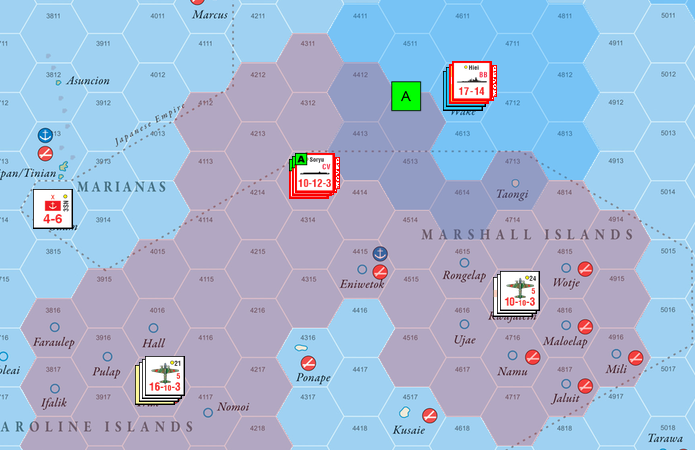
Reactions: The Allies opt for an intel roll: 6. So the intelligence status changes to Intercept. They activate no reaction units.
Battle Resolution: There is one battle hex to resolve:
- Wake Island (A): Japan 53 vs. Allies 1. Japan roll: 9 for 53 hits and a critical hit, Allies roll: 5 for 1 hit. VF-211 is eliminated. Ground Battle Rolls: Japan 8, Allies 0. The Marine Brigade is eliminated too, Japan takes Wake Island.
Post Battle Movement: The Allies have no active unit eligible for PBM, so Japan conducts PBM next.
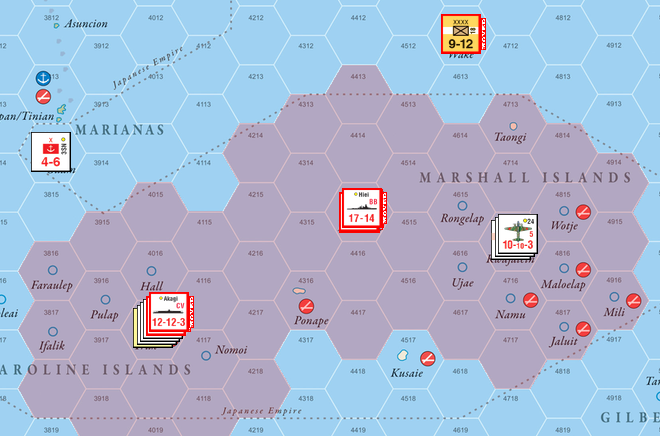
- BB Hiei and CV Soryu move to Eniwetok (4415)
- CV Akagi and CV Shokaku move to Truk (4017)
Allies Card 4: Pass
The Allies use their second pass.
Japan Card 5: Ha-Go (#50) as EC

Time to make some incursions into Burma.
Activations and Movements: South HQ for 7 activations
- 15th Army moves North to hex 2108. Will be a battle hex.
- 5th Air Division moves to Bangkok (2110) to join the 4th Air Division on their attack on Ragoon (2008). Another battle hex.
- [22nd Air Fleet] moves to Palembang (1916), 3rd Air Division to Soerabaja (2220); both attack Tjilatjap (2019). Third battle hex.
- 2nd Air Division moves to Clark Field (2812) to keep SW Pacific HQ out of play.
- [17th Army] invades Wewak (3720) on New Guinea.
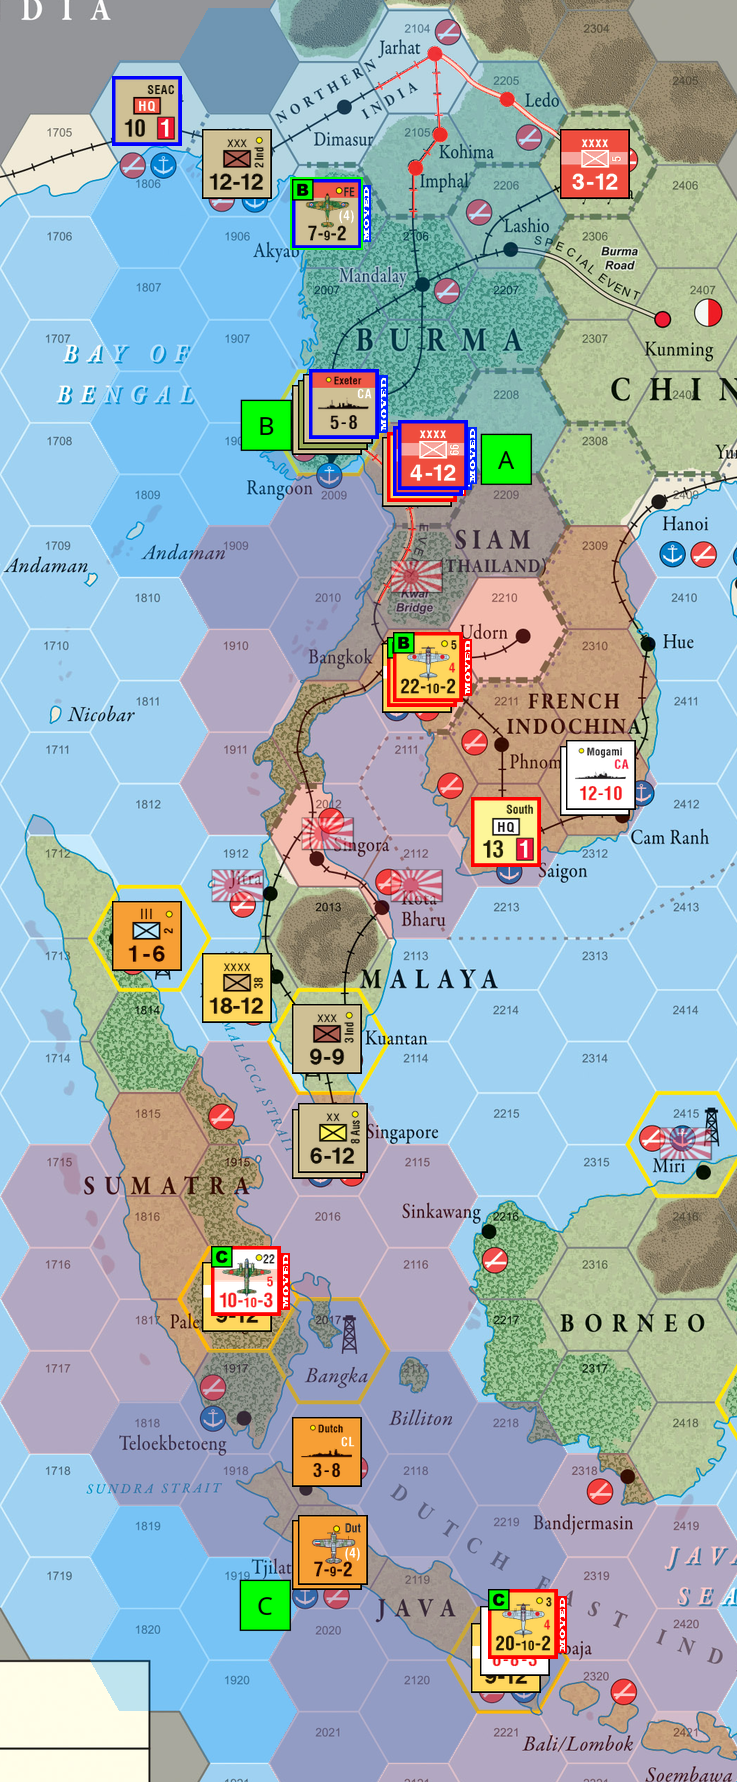
This is a bit of a gamble here: The Allies can either react to my attacks on Burma, or thwart my invasion of New Guinea. I hope that defending Ragoon is more important to them, and that they will leave the [17th Army] alone - for now.
Reactions: The Allies play a reaction card:
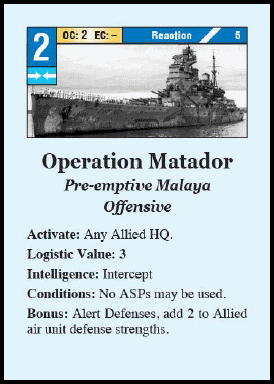
Allies activate SEAC HQ for 4 activations.
- CA Exeter moves to Ragoon (2008), FE Air Unit to Akyab (2006), both take part in battle B.
- [6th Chinese Army] and [66th Chinese Army] move to Kwai Bridge North (2108) to join battle A.
Battle Resolution: There are five battle hexes to resolve:
- Kwai Bridge North (A): Ground Battle only, Japan 20 vs. Allies 13. Japan roll: 2 for 10 hits, Allies roll: 0 for 7 hits. [1st Burma Division] is flipped for a step loss. (DRMs didn’t change anything)
- Ragoon (B): Japan 21 vs. Allies 12. Japan roll: 0 for 6 hits, Allies roll: 0 for 3 hits. No effect.
- Tjilatjap (C): Japan 30 vs. Allies 7. Japan roll: 5 for 15 hits, Allies roll: 3 for 4. [Dutch Air Unit] is flipped for a step loss.
Post Battle Movement: The Allies keep all units where they are, so Japan conducts PBM next.
- 5th Air Division moves to Taihoku (3009)
- 3rd Air Division moves to Davao (2915)
- [22th Air Fleet] moves back to Kuala Lumpur (1913)
Retreats:
- All Allied units from battle A retreat one hex North to hex 2107.
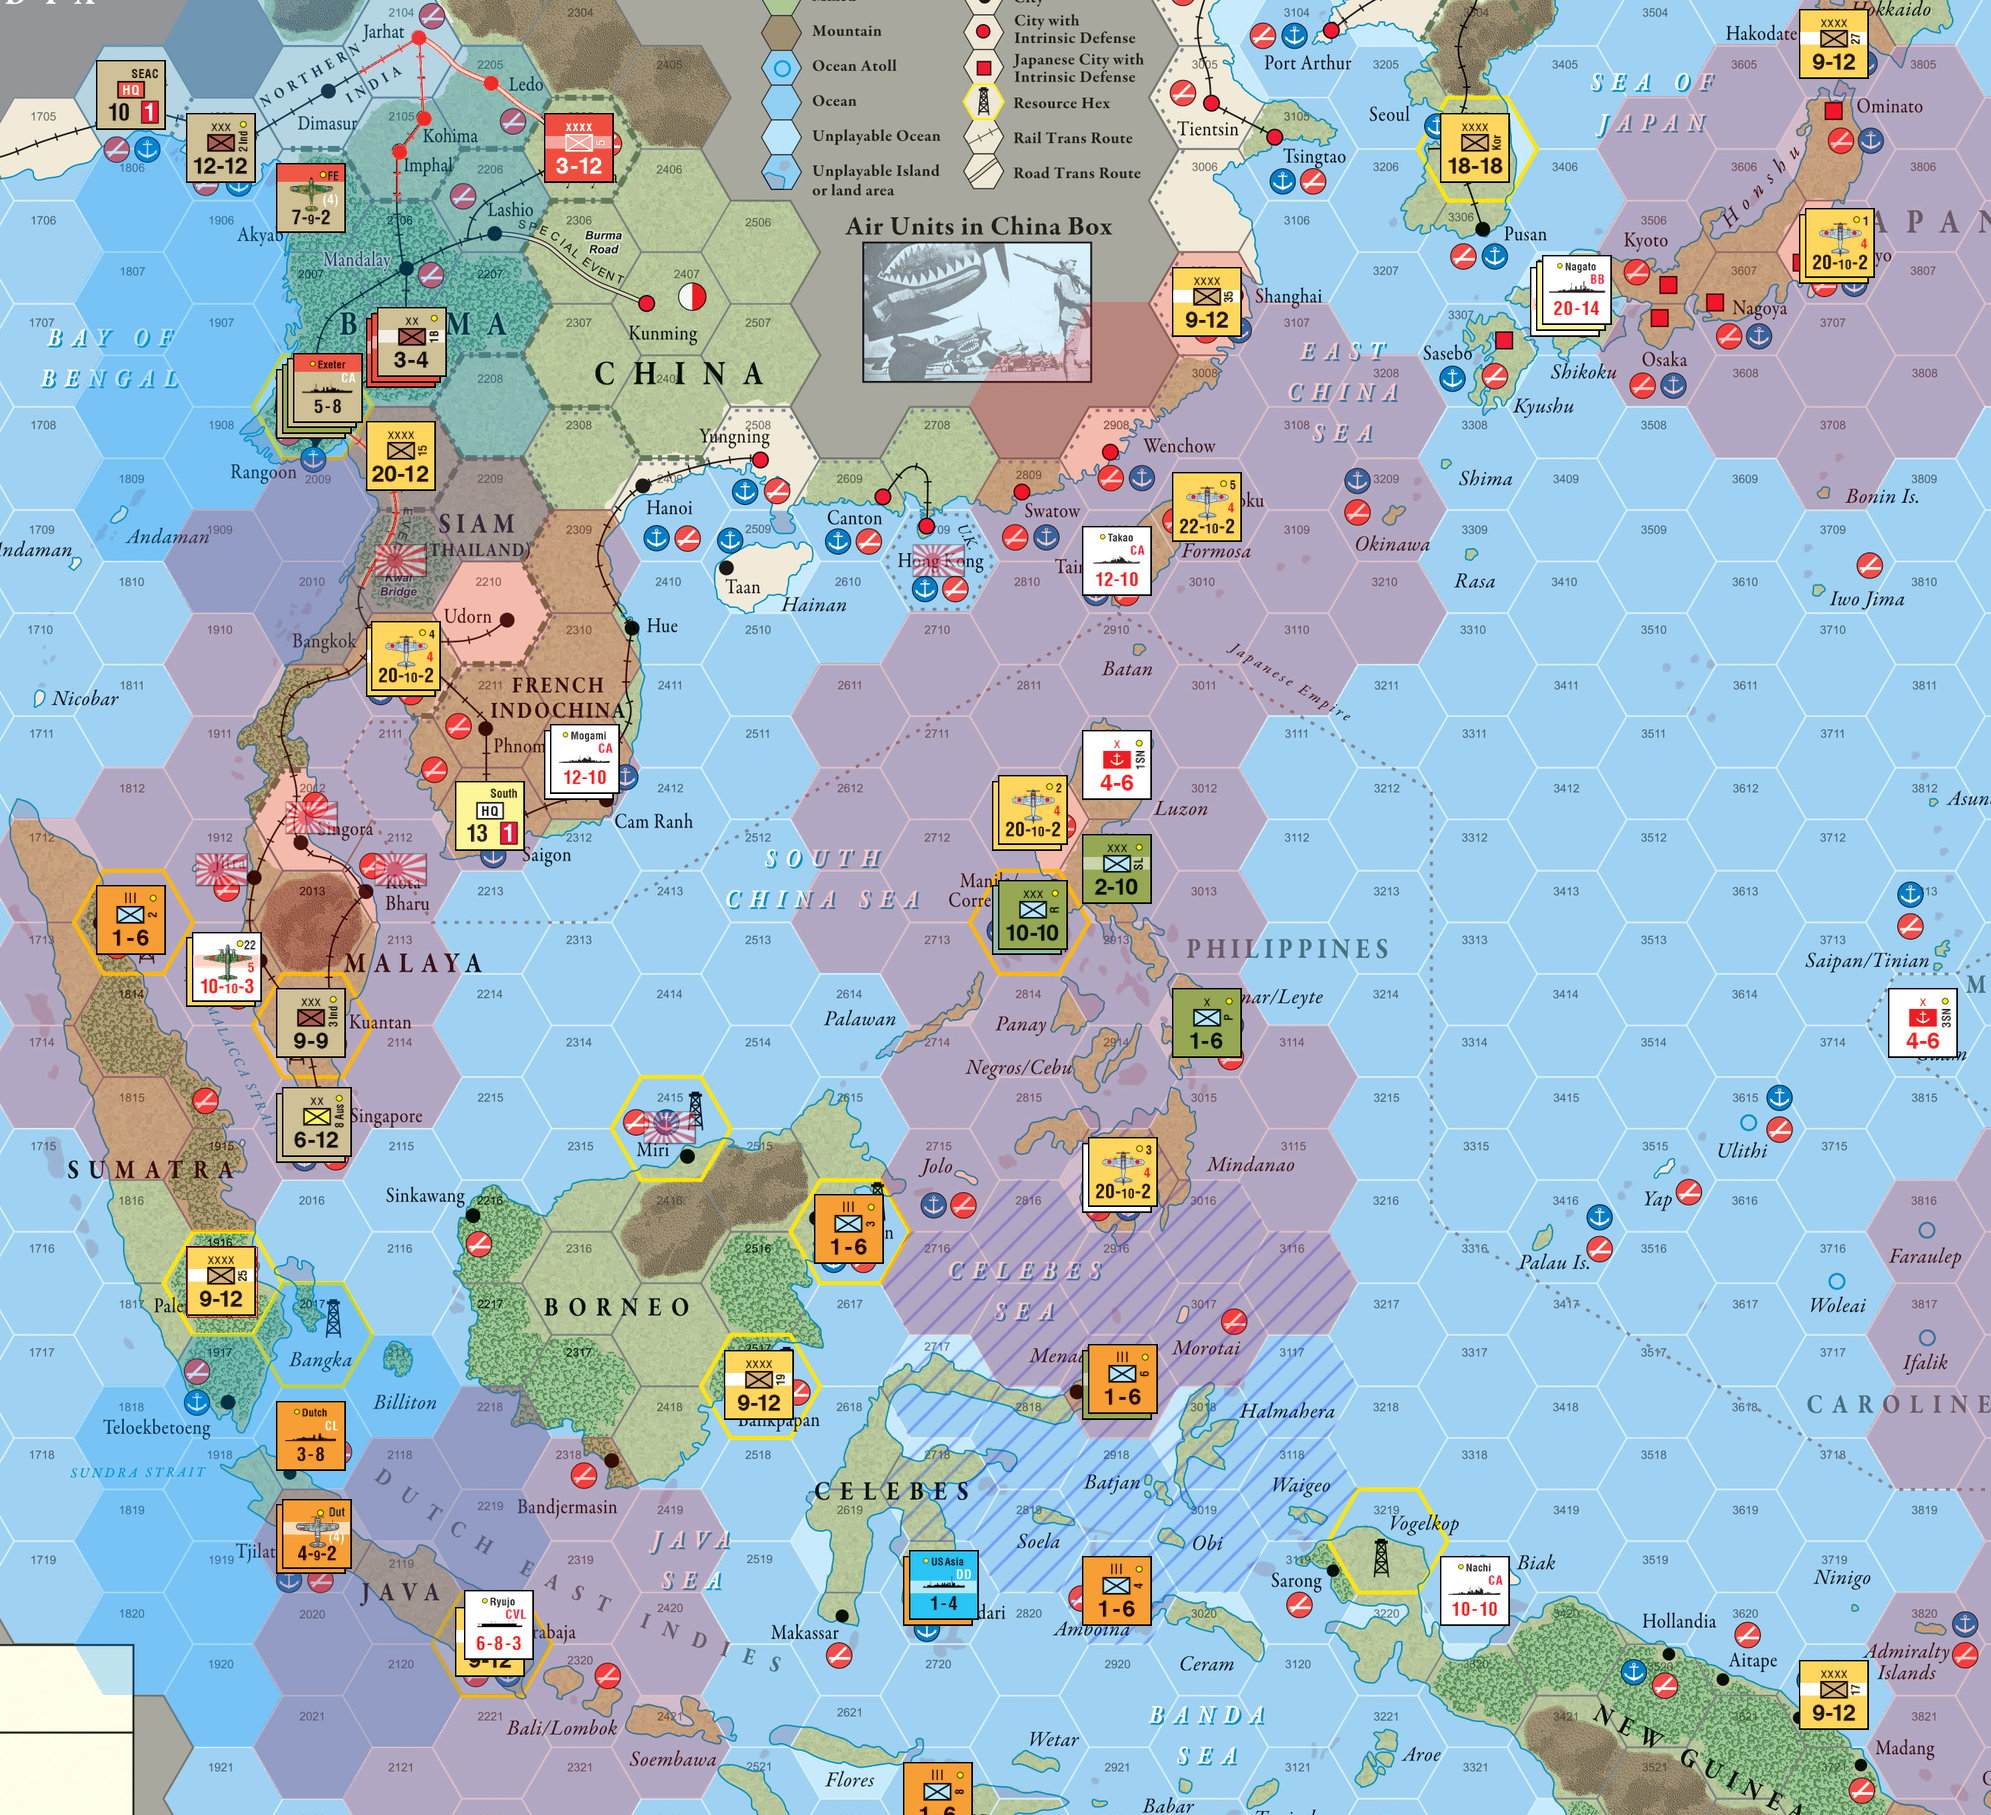
While I didn’t do a lot of damage, I’m at least threatening Ragoon now, and I have a foothold in New Guinea.
Allies Card 5: S-Day (#69) as OC
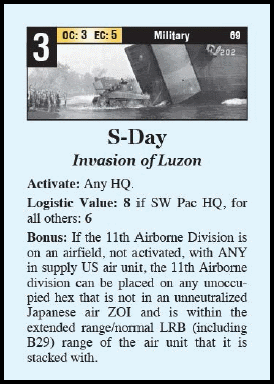
The Allies use this 3OC card to fix the Jarhat route in Northern India.
Japan Card 6: Tokyo Rose (#74) as OC

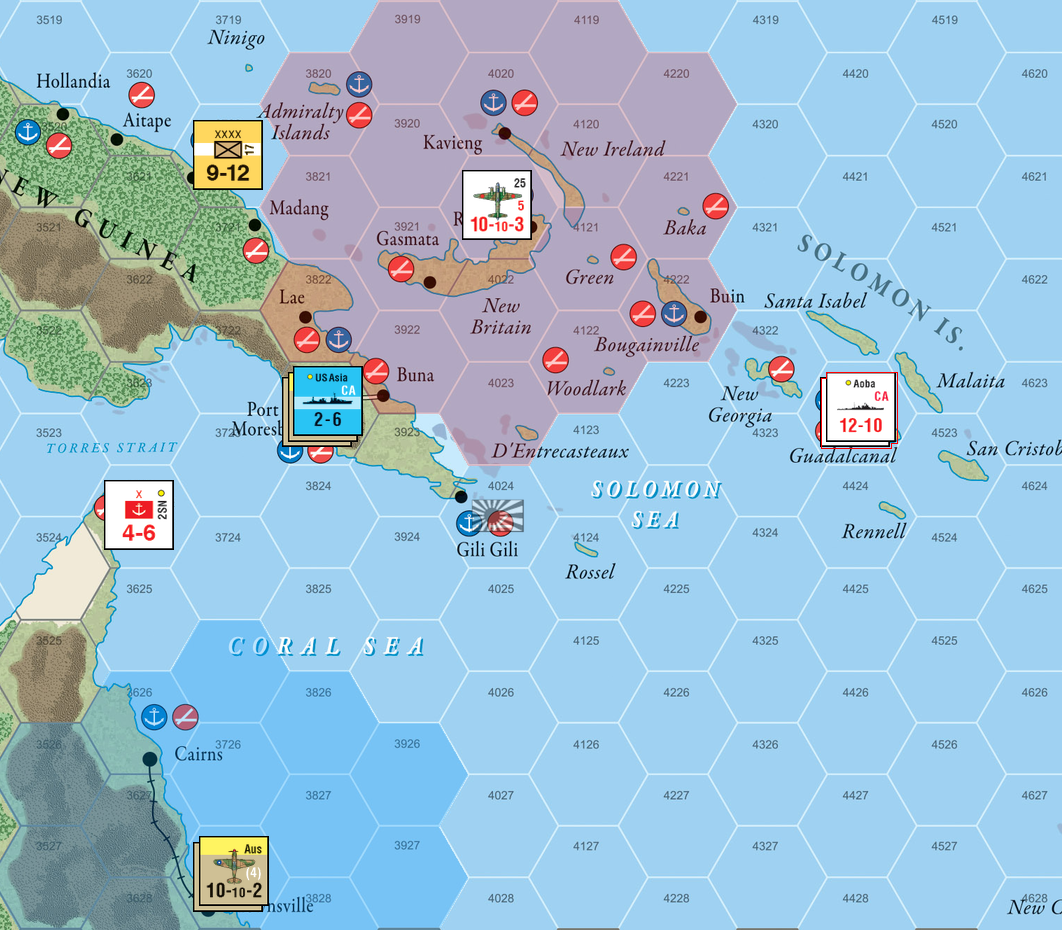
I conduct a small sneak attack on Guadalcanal and Cape York.
Activations and Movements: South Sea HQ for 3 activations
- 2nd Naval Brigade invades Cape York (3624)
- CA Aoba and the SS Naval Brigade invade Guadalcanal (4423)
So Special Reactions possible, so Japan takes both hexes unopposed.
Allies Card 6: ??? (#??) as FOQ
The Allies save their last card in the Future Offensive Queue.
Japan Card 7: Combined Fleet (#29) as EC

Now that I know that the Allies can no longer trap me with a Surprise Attack card, I can finally try to hit the US carriers in the Fijis.
Activations and Movements: Combined Fleet HQ for 7 activations (see what I did there?)
- BB Hiei moves to Viti (5325), CV Soryu to hex 5322, CV Akagi and CV Shokaku to hex 5024, they all attack Viti. Battle hex A.
- the 21st and 23rd Air Fleets move to Rabaul (4021) to attack Port Moresby (3823). Will be a battle hex.
- The 3rd Air Division moves to Soerabaja (2220) to take another stab at the [Dutch Air Unit] in Tjilatjap (2019). Third battle hex.
Reactions: Allies intel roll: 9. Surprise Attack! This could get vicious.

Battle Resolution: There there are three battle hexes to resolve:
- Viti (A): Japan 53. Japan roll: 9 for 53 hits and a critical hit. The American carriers are both sunk in a surprise attack. Midway reversed.
- Port Moresby (B): Japan 32. Japan roll: 4 for 16 hits. CA Kent is sunk. Allies roll: 2 for 2 hits, no effect.
- Tjilatjap (C): Japan 20. Japan roll: 2 for 5 hits, Allies roll: 7 for 4 hits, no effect.
Post Battle Movement:
- The 21st Air Fleet moves to Wewak (3720)
- The 23rd Air Fleet moves to Gili Gili (4024)
- The 3rd Air Division moves to Davao (2915)
- The Strike Force against Viti moves back to their original ports on Truk and Eniwetok, respectively
A vicious attack! Sinking both Allied carriers will decrease Political Will by one; extremely lucky, after I played Tokyo Rose for OC, and not for the event.
End of Turn 2, National Status
Australian Mandate Territory: Since Japan holds Rabaul and Guadalcanal, they take control of all Mandate hexes. No Allied units must conduct Emergency Movement.
Attrition: A total of six Allied units are out of supply and lose a step:
- [3rd Indian Corps] in Kuantan (2014)
- [8th Australian Division] Singapore (2015)
- [US R Corps] in Manila (2813)
- [US SL Corps] in hex 2912 (Philippines)
- [1st Australian Corps] in Darwin (3023)
- [2nd Australian Corps] in Townsville (3727)
All Japanese units are in supply.
US Political Will: US Political Will is reduced by one to +7 due to the loss of all US carriers this turn.
Conclusion
This is the situation at the conclusion of Turn 2:
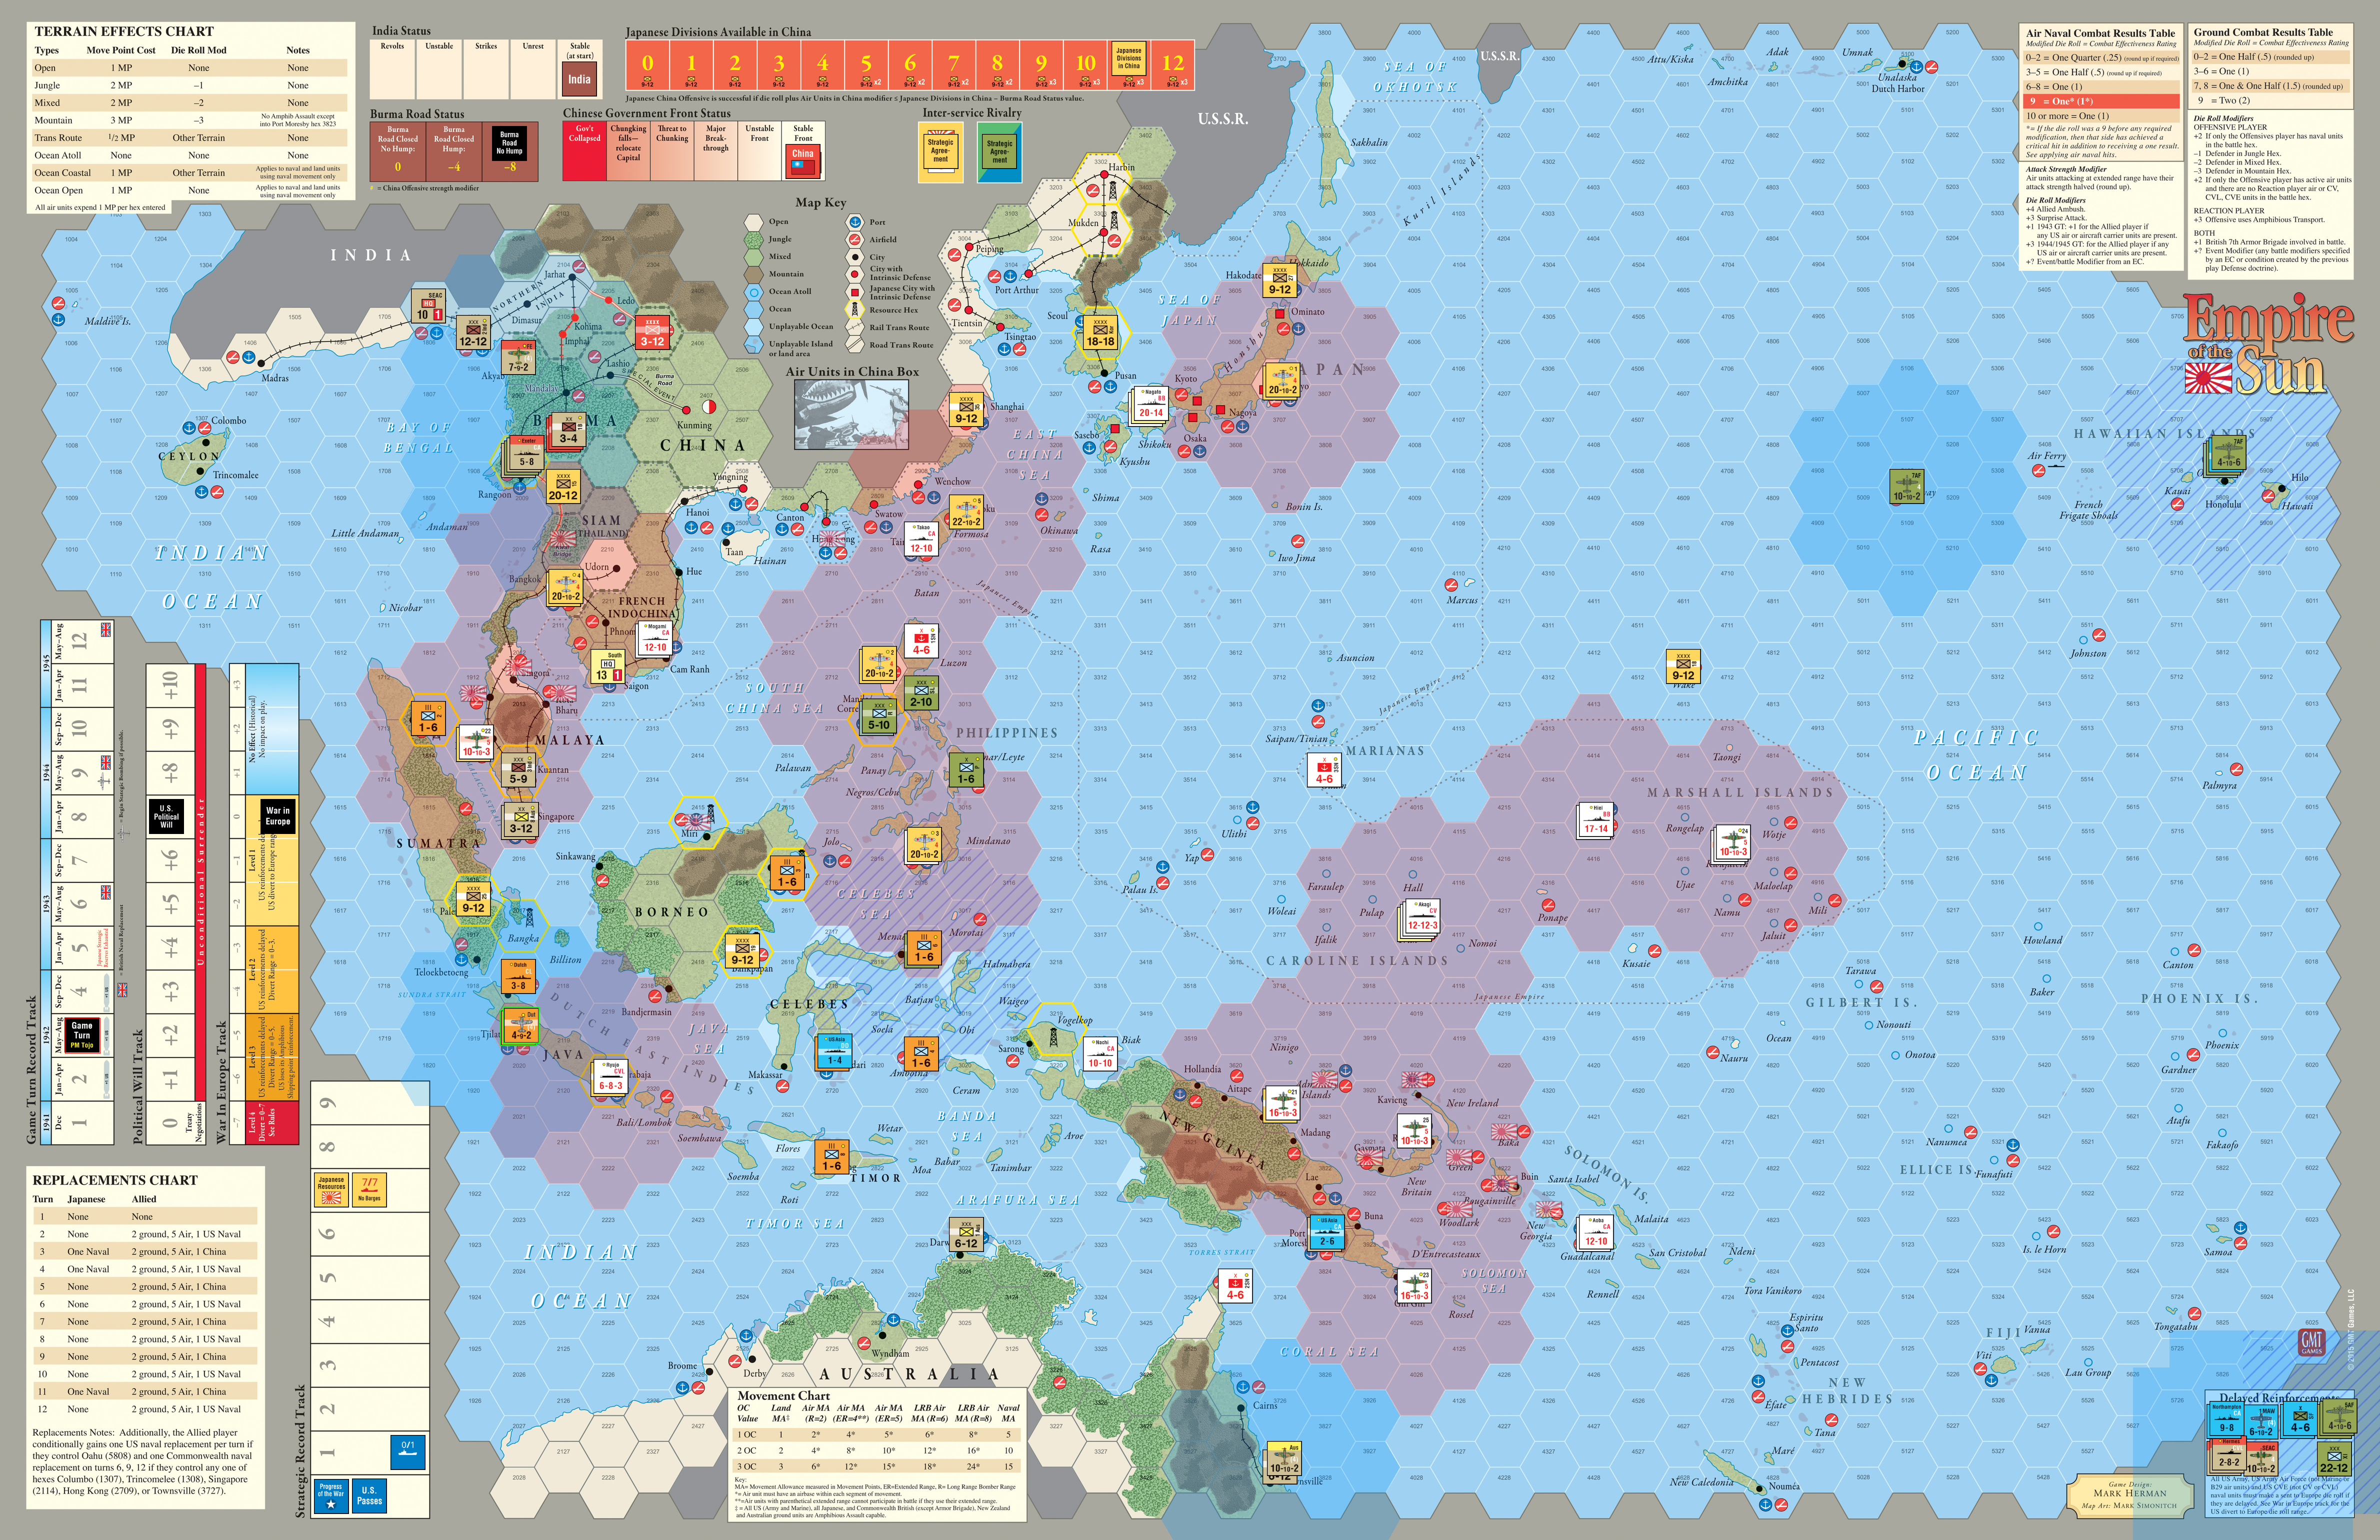
Not too bad for the Japanese. I traded two air units steps for a heavy cruiser, two carriers, and three air units - not bad!
Port Moresby and most of New Guinea is out of supply, so placement options for HQs and units next turn will be very limited for the Allies. Which should benefit me greatly.
Credits
- Title picture: Airplanes on a Japanese carrier (supposedly the Shōkaku), preparing on the morning of December 7th, 1941 for the attack on Pearl Harbor; Official U.S. Navy Photograph 80-G-71198, now in the collections of the National Archives.